Icon

Approving Timesheet Guideline

This is a step-by-step guide for Timesheet Approval

By Marte Alrey Reyes

Approving Timesheet Guideline

Website: Shiftcare <https://app.shiftcare.com/users/areas>

Purpose: To have AI help to check and approve timesheets according to the considerations provided.

Key Considerations:

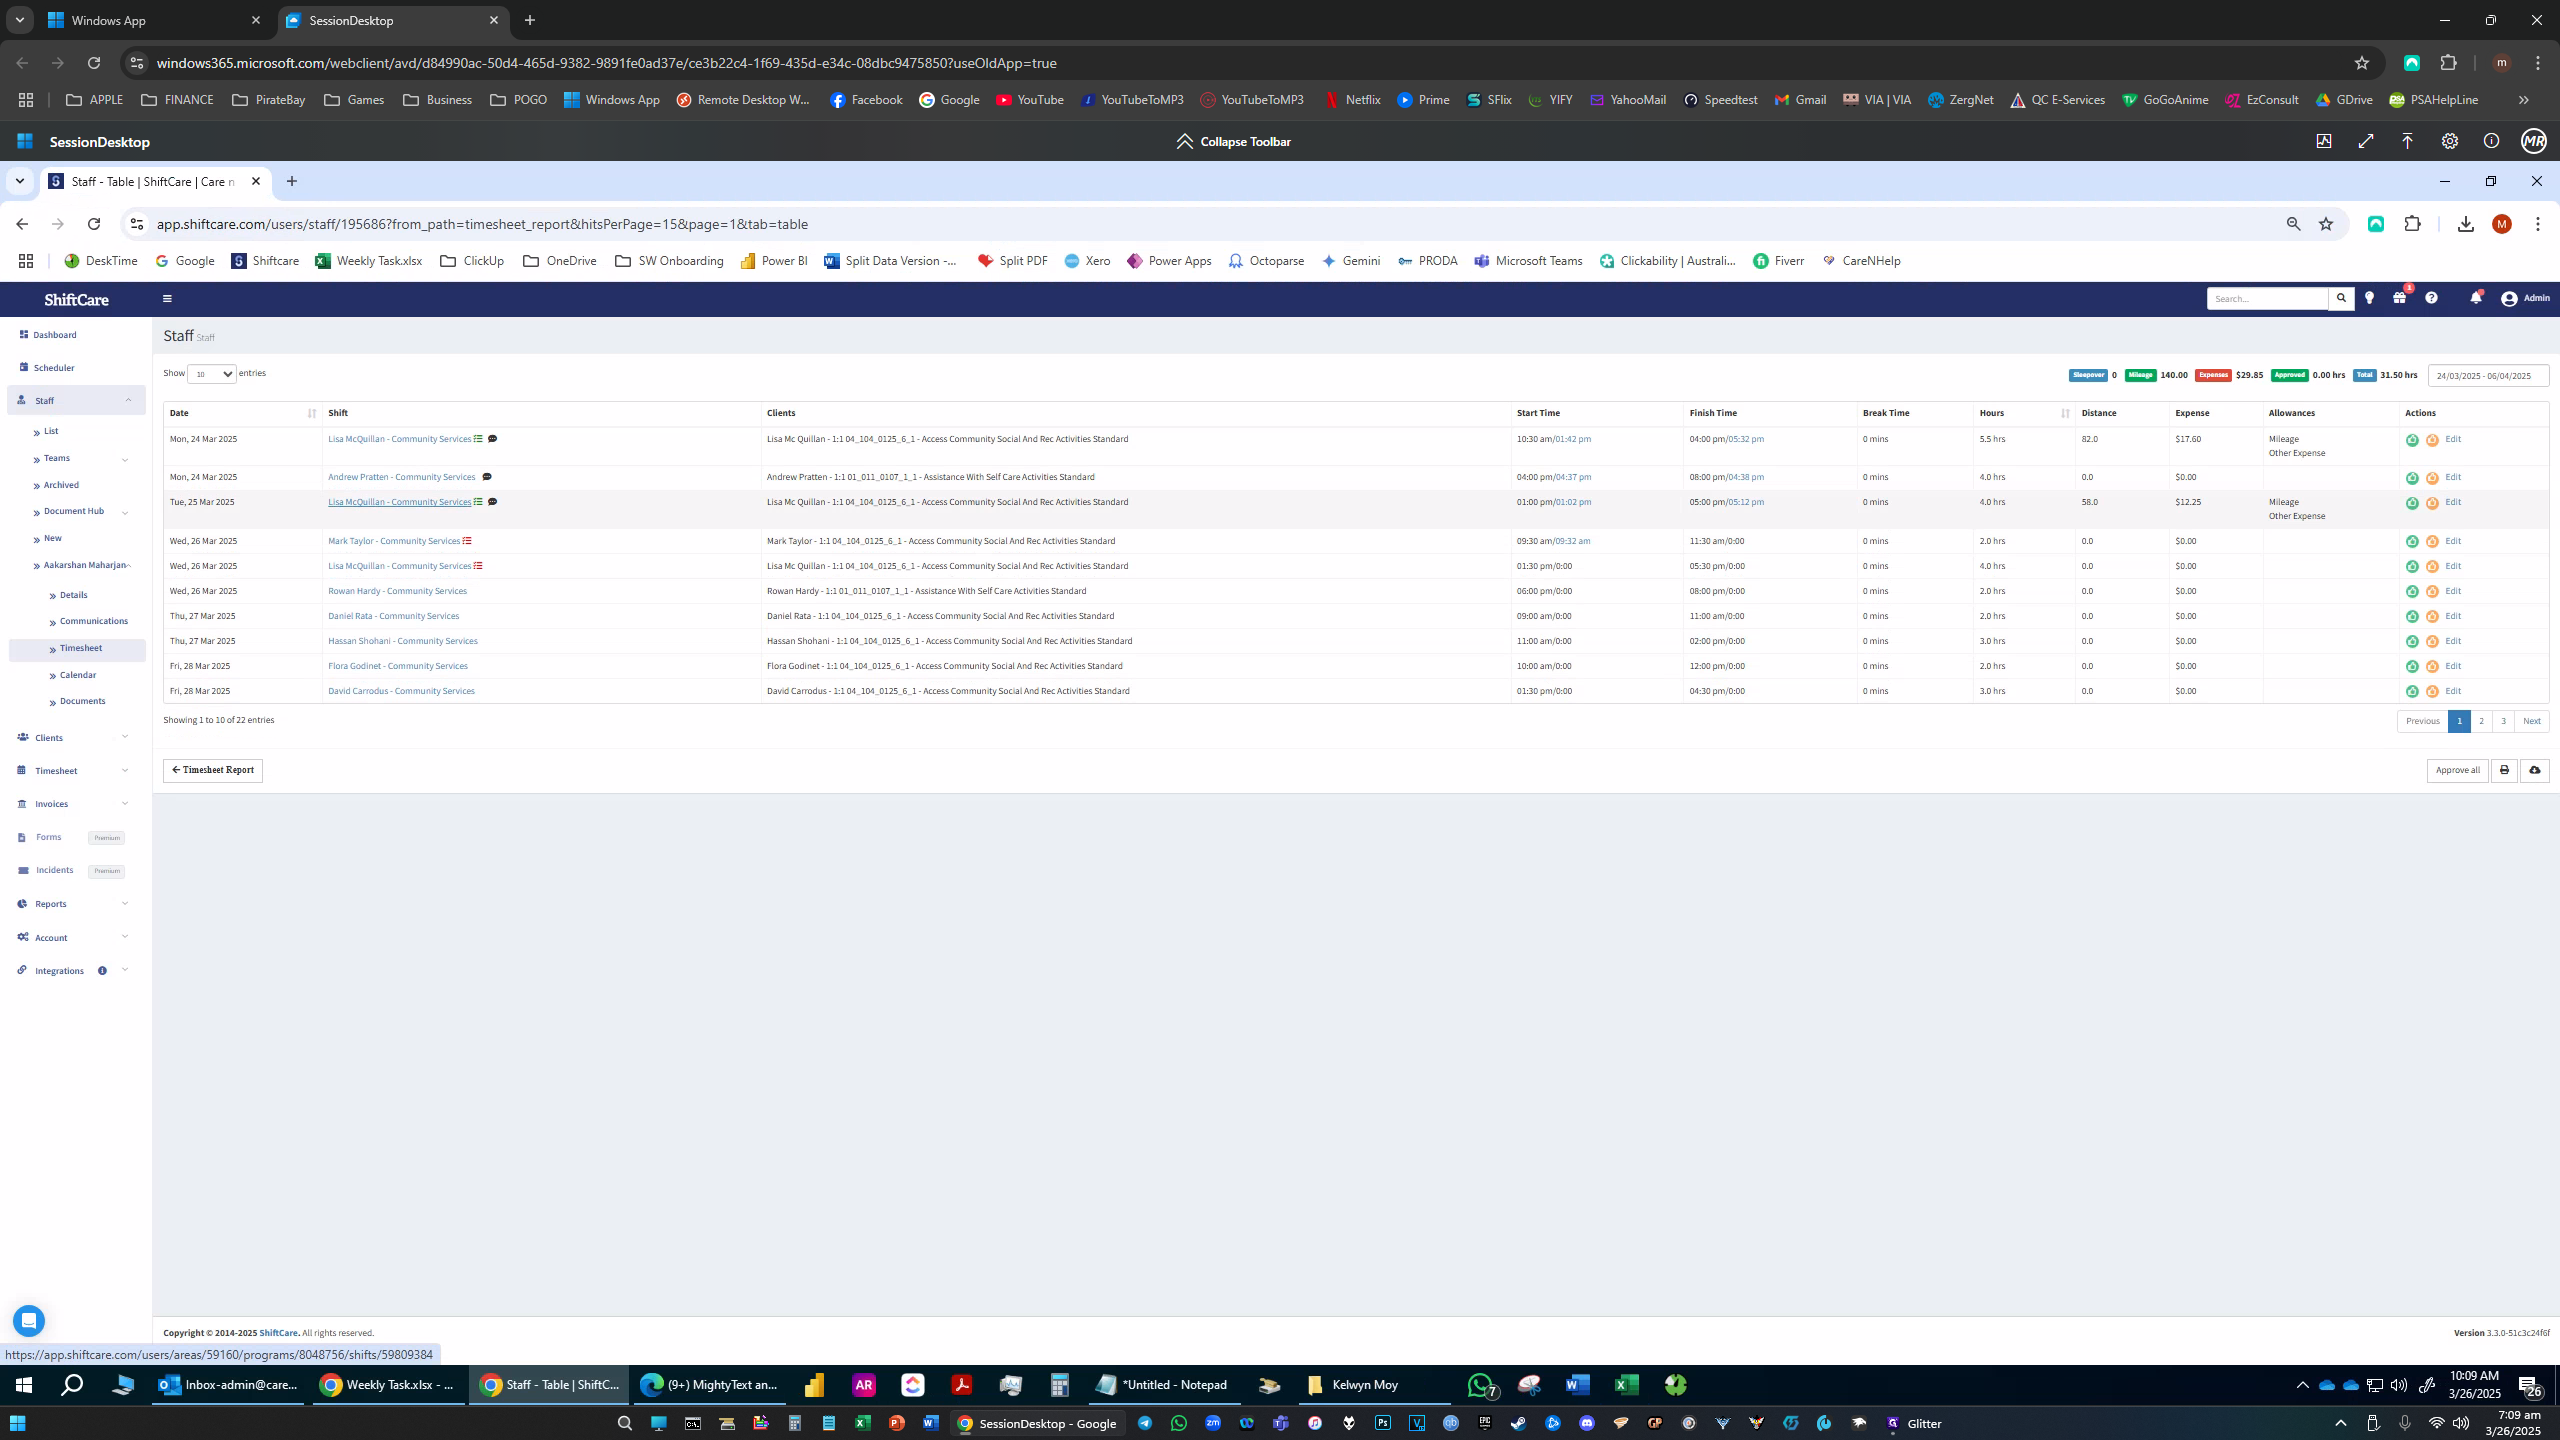
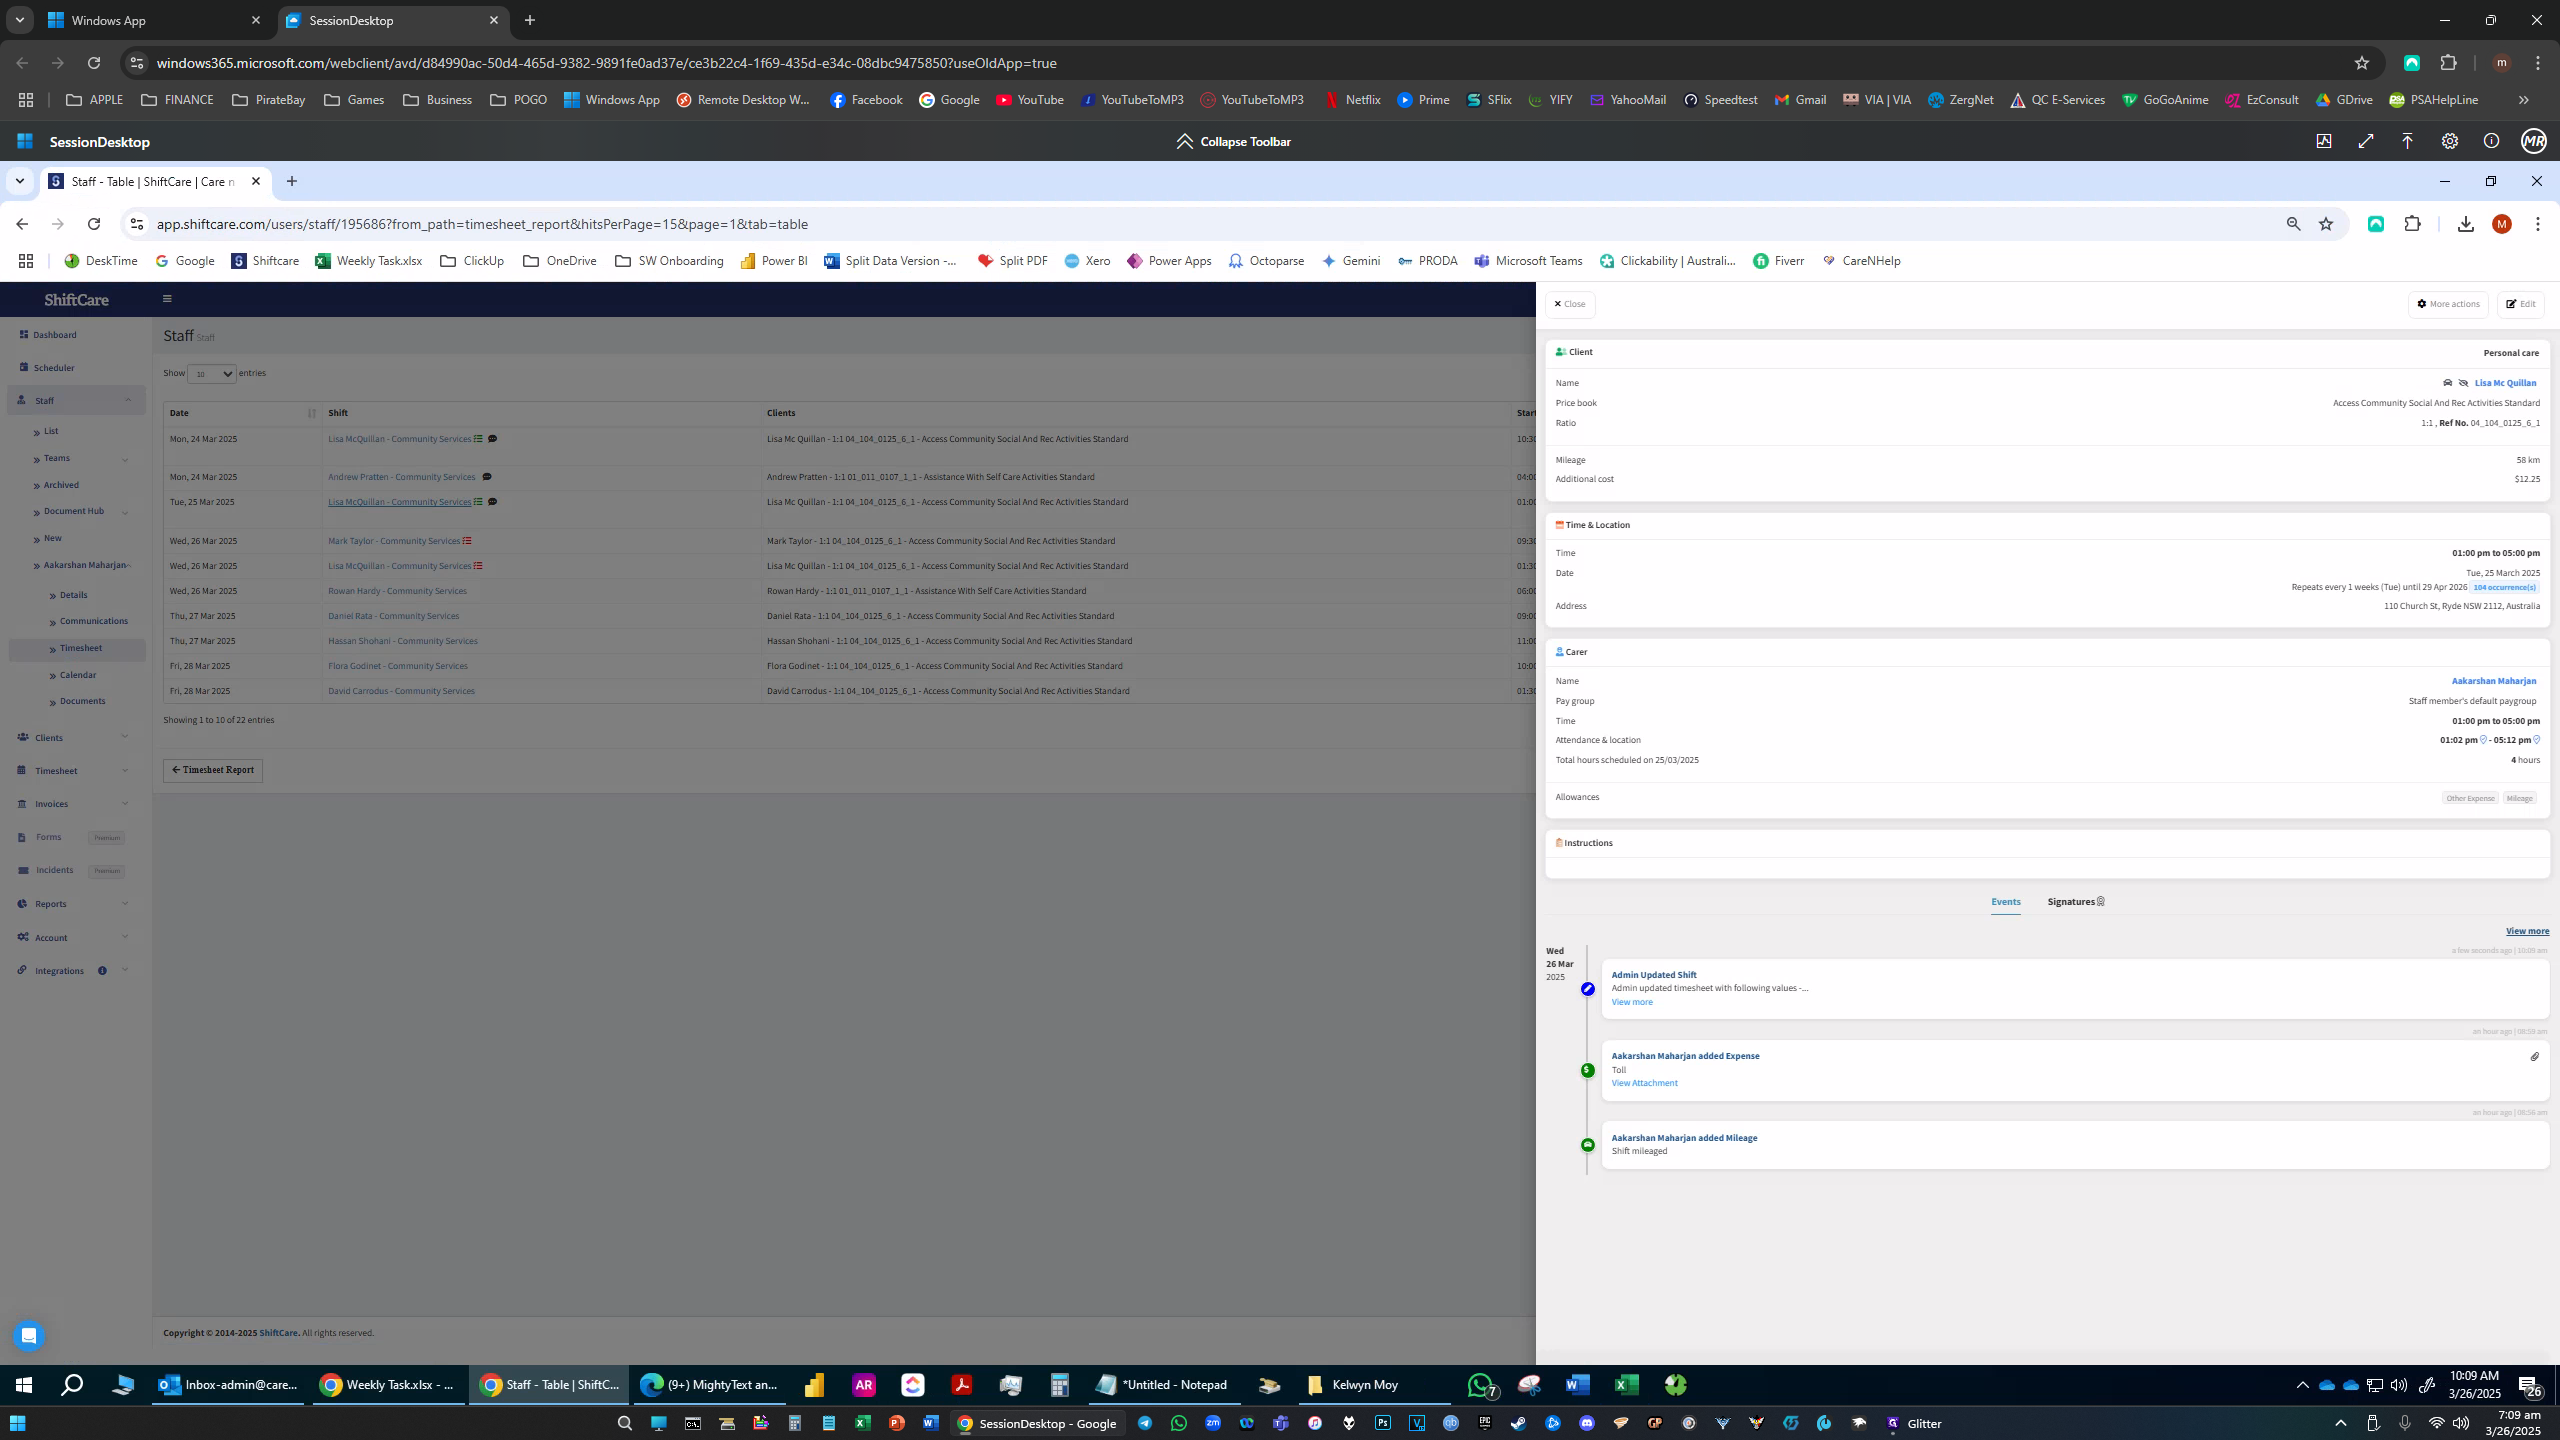
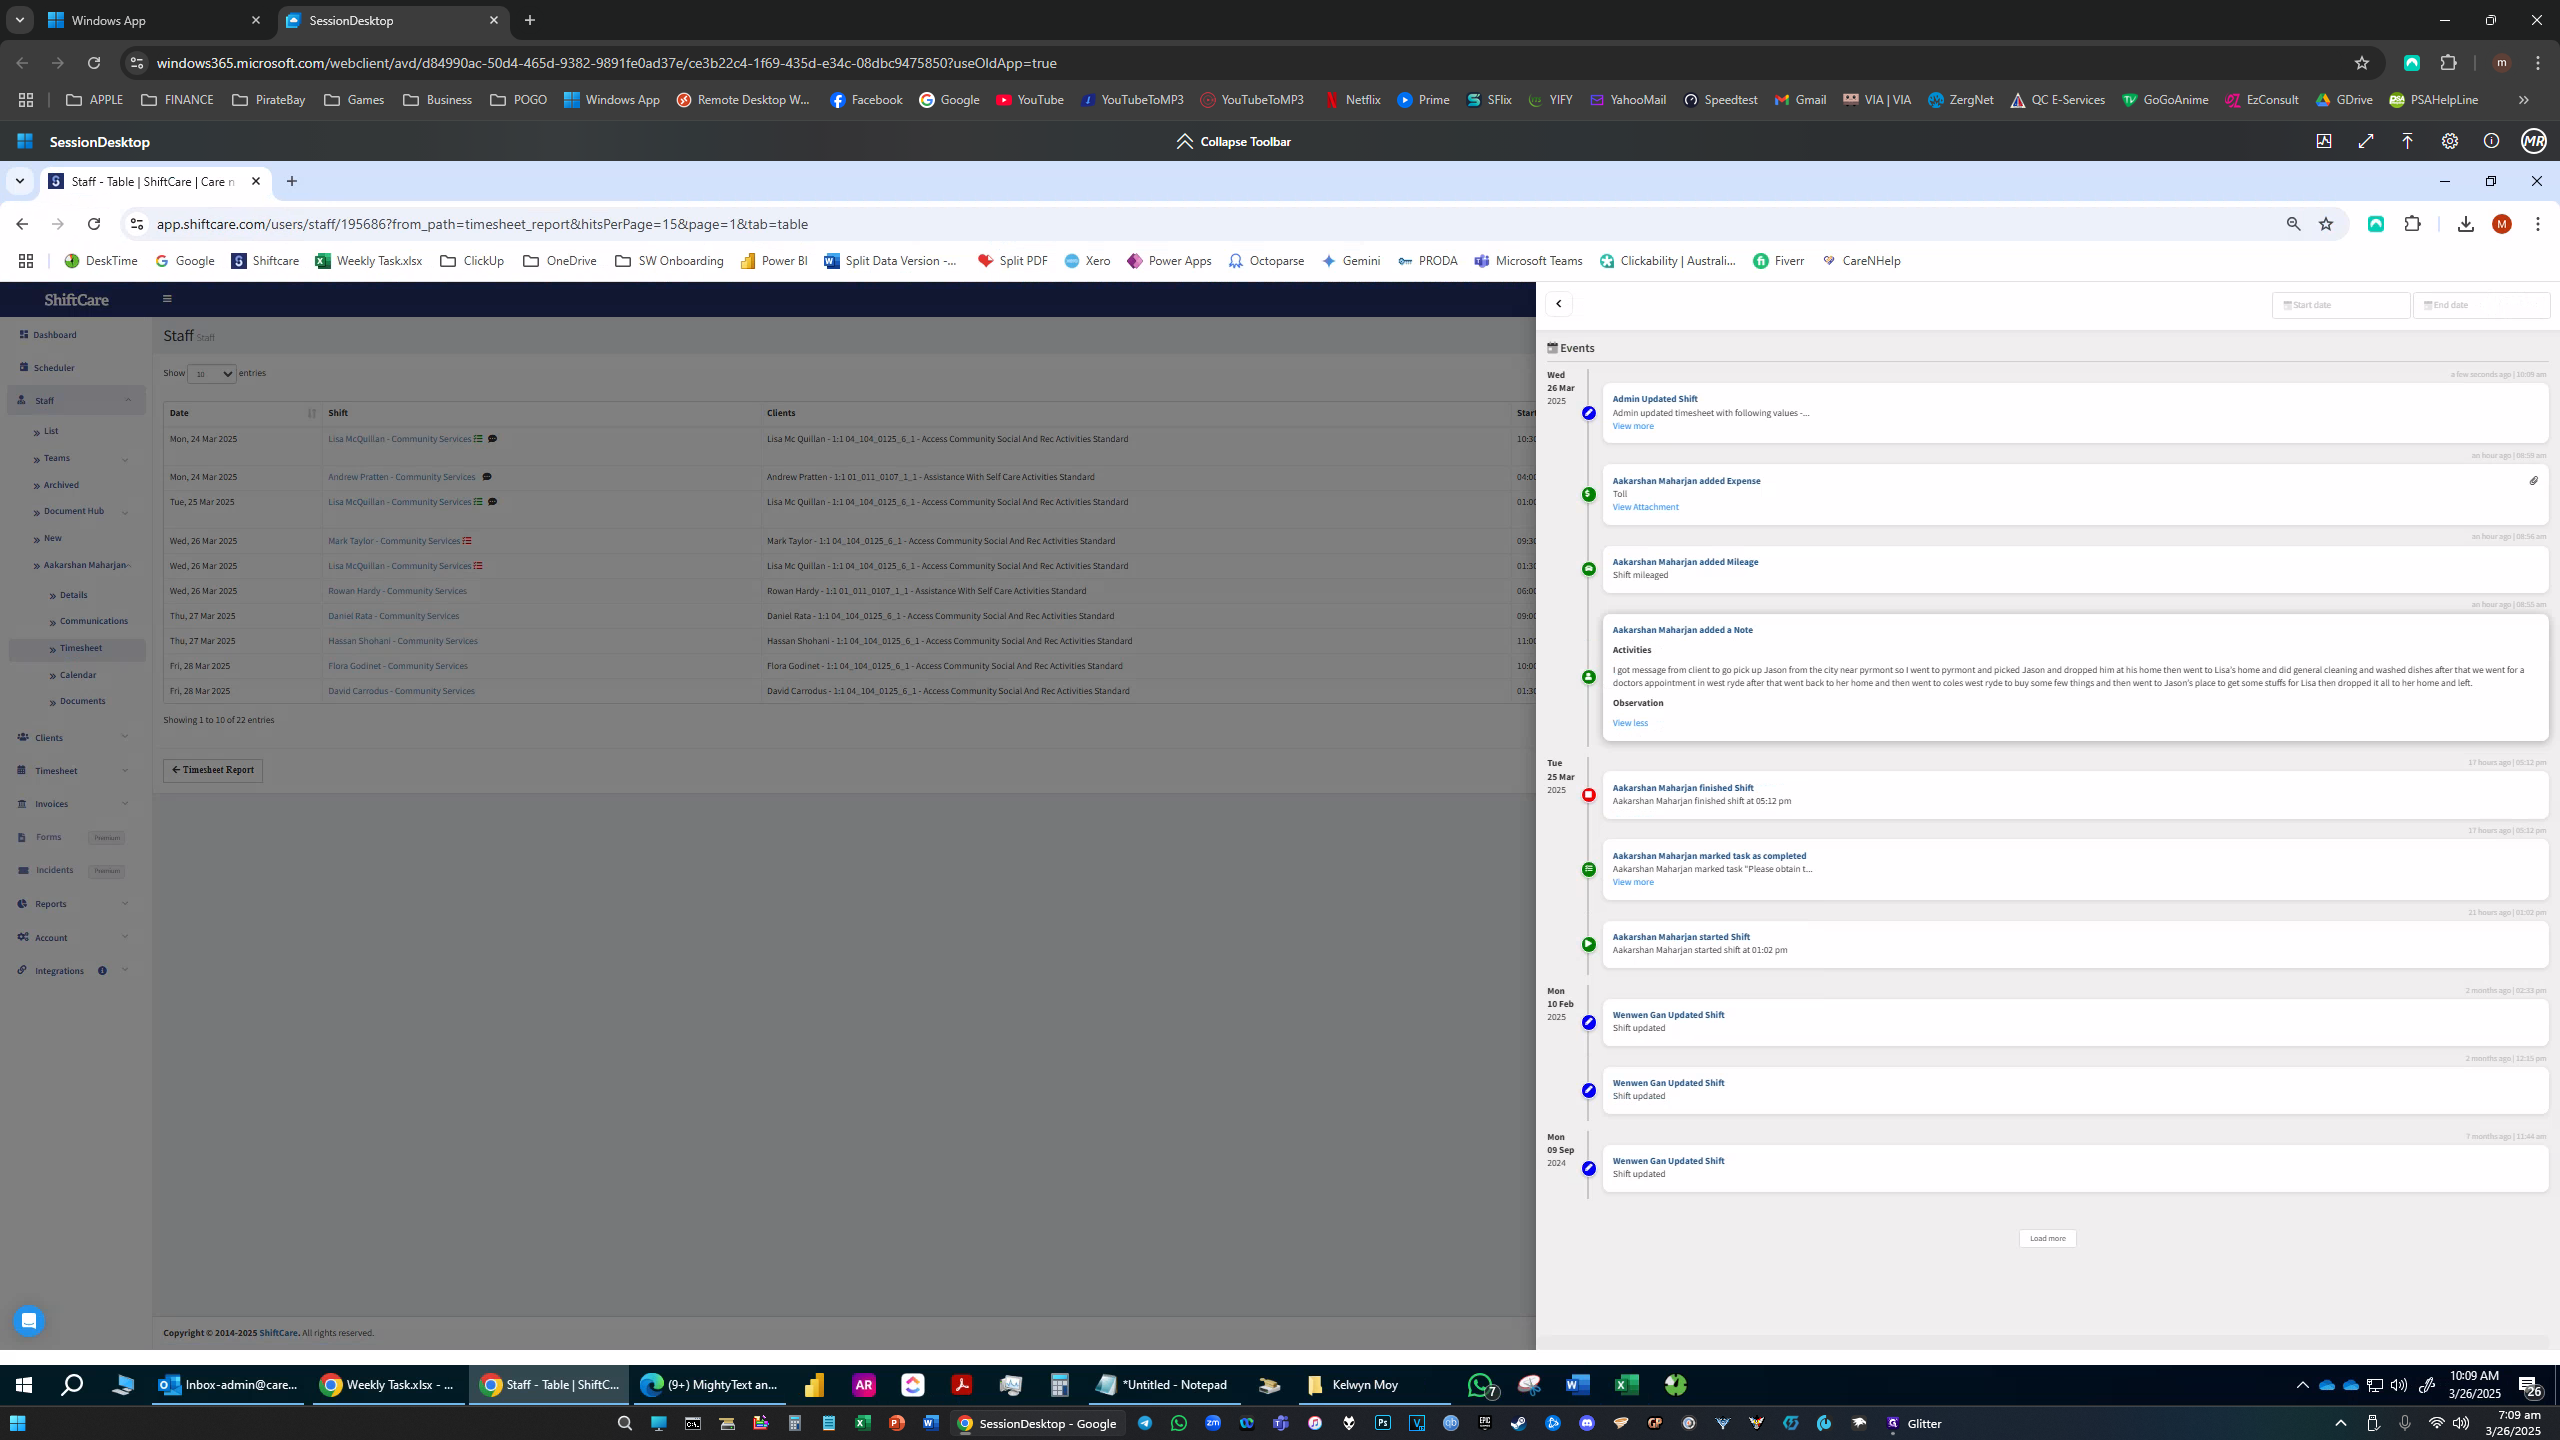
1. The shift schedule cannot be approved if there are no shift notes yet

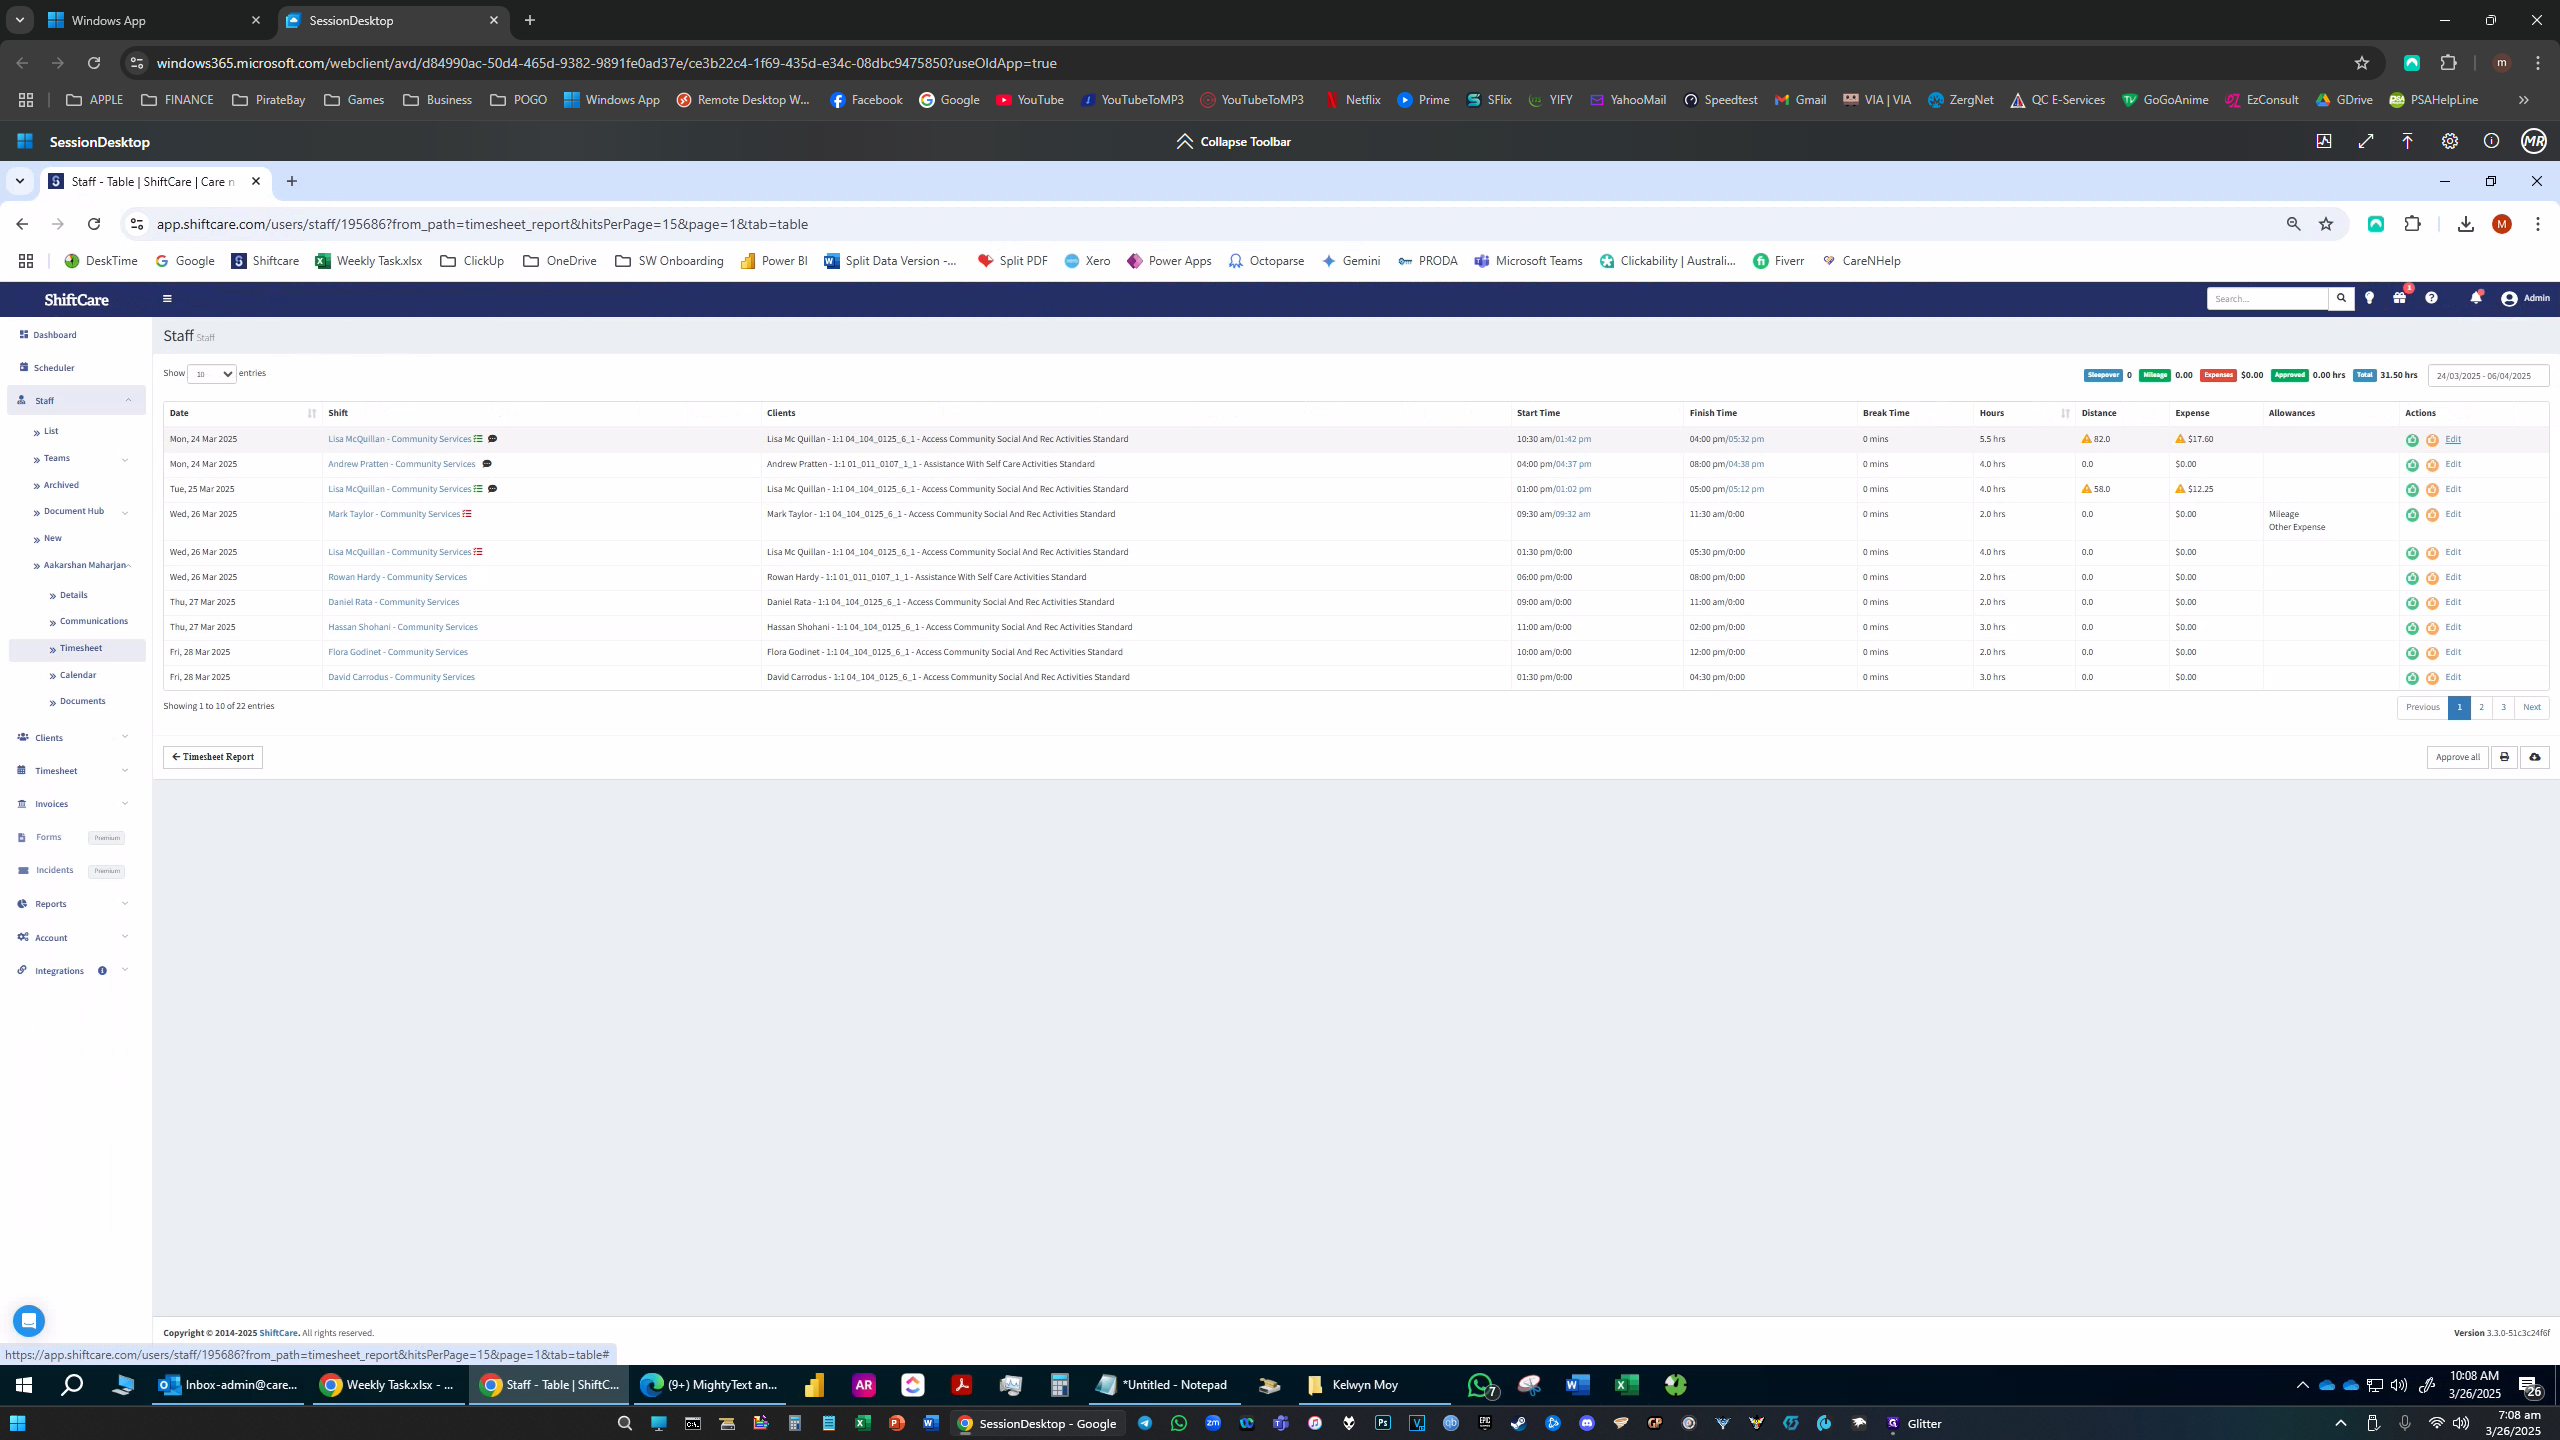
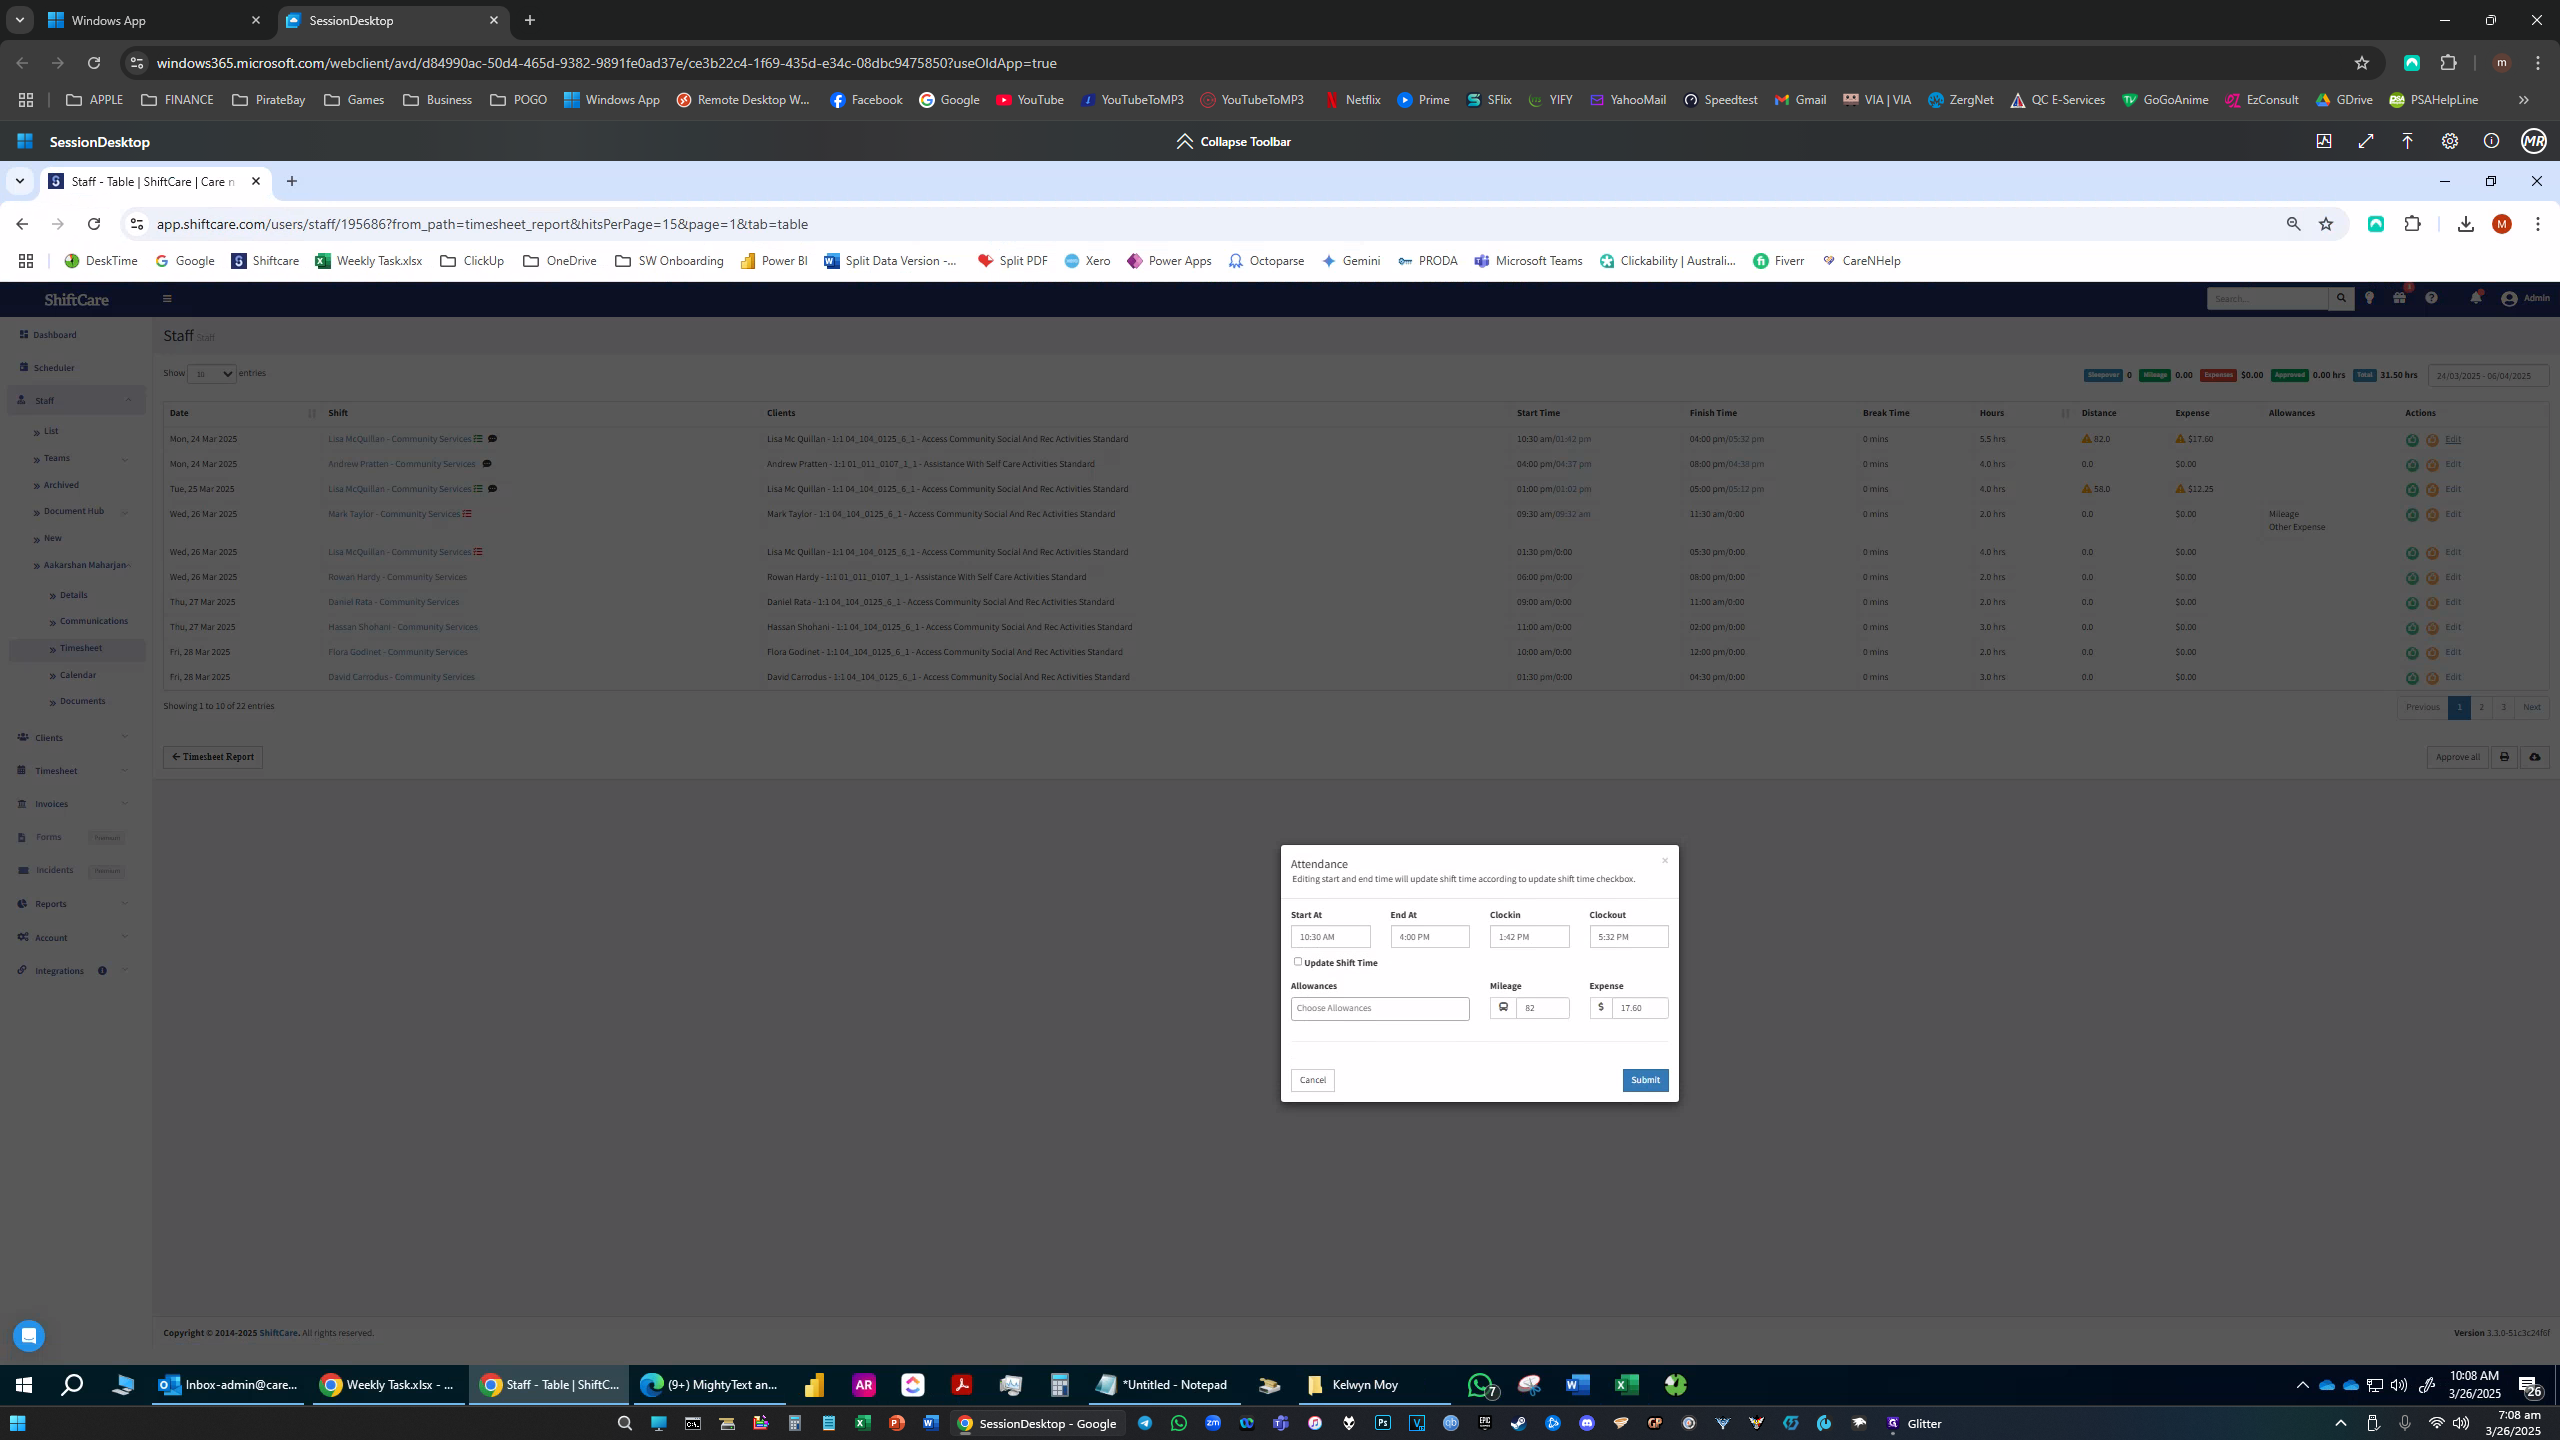
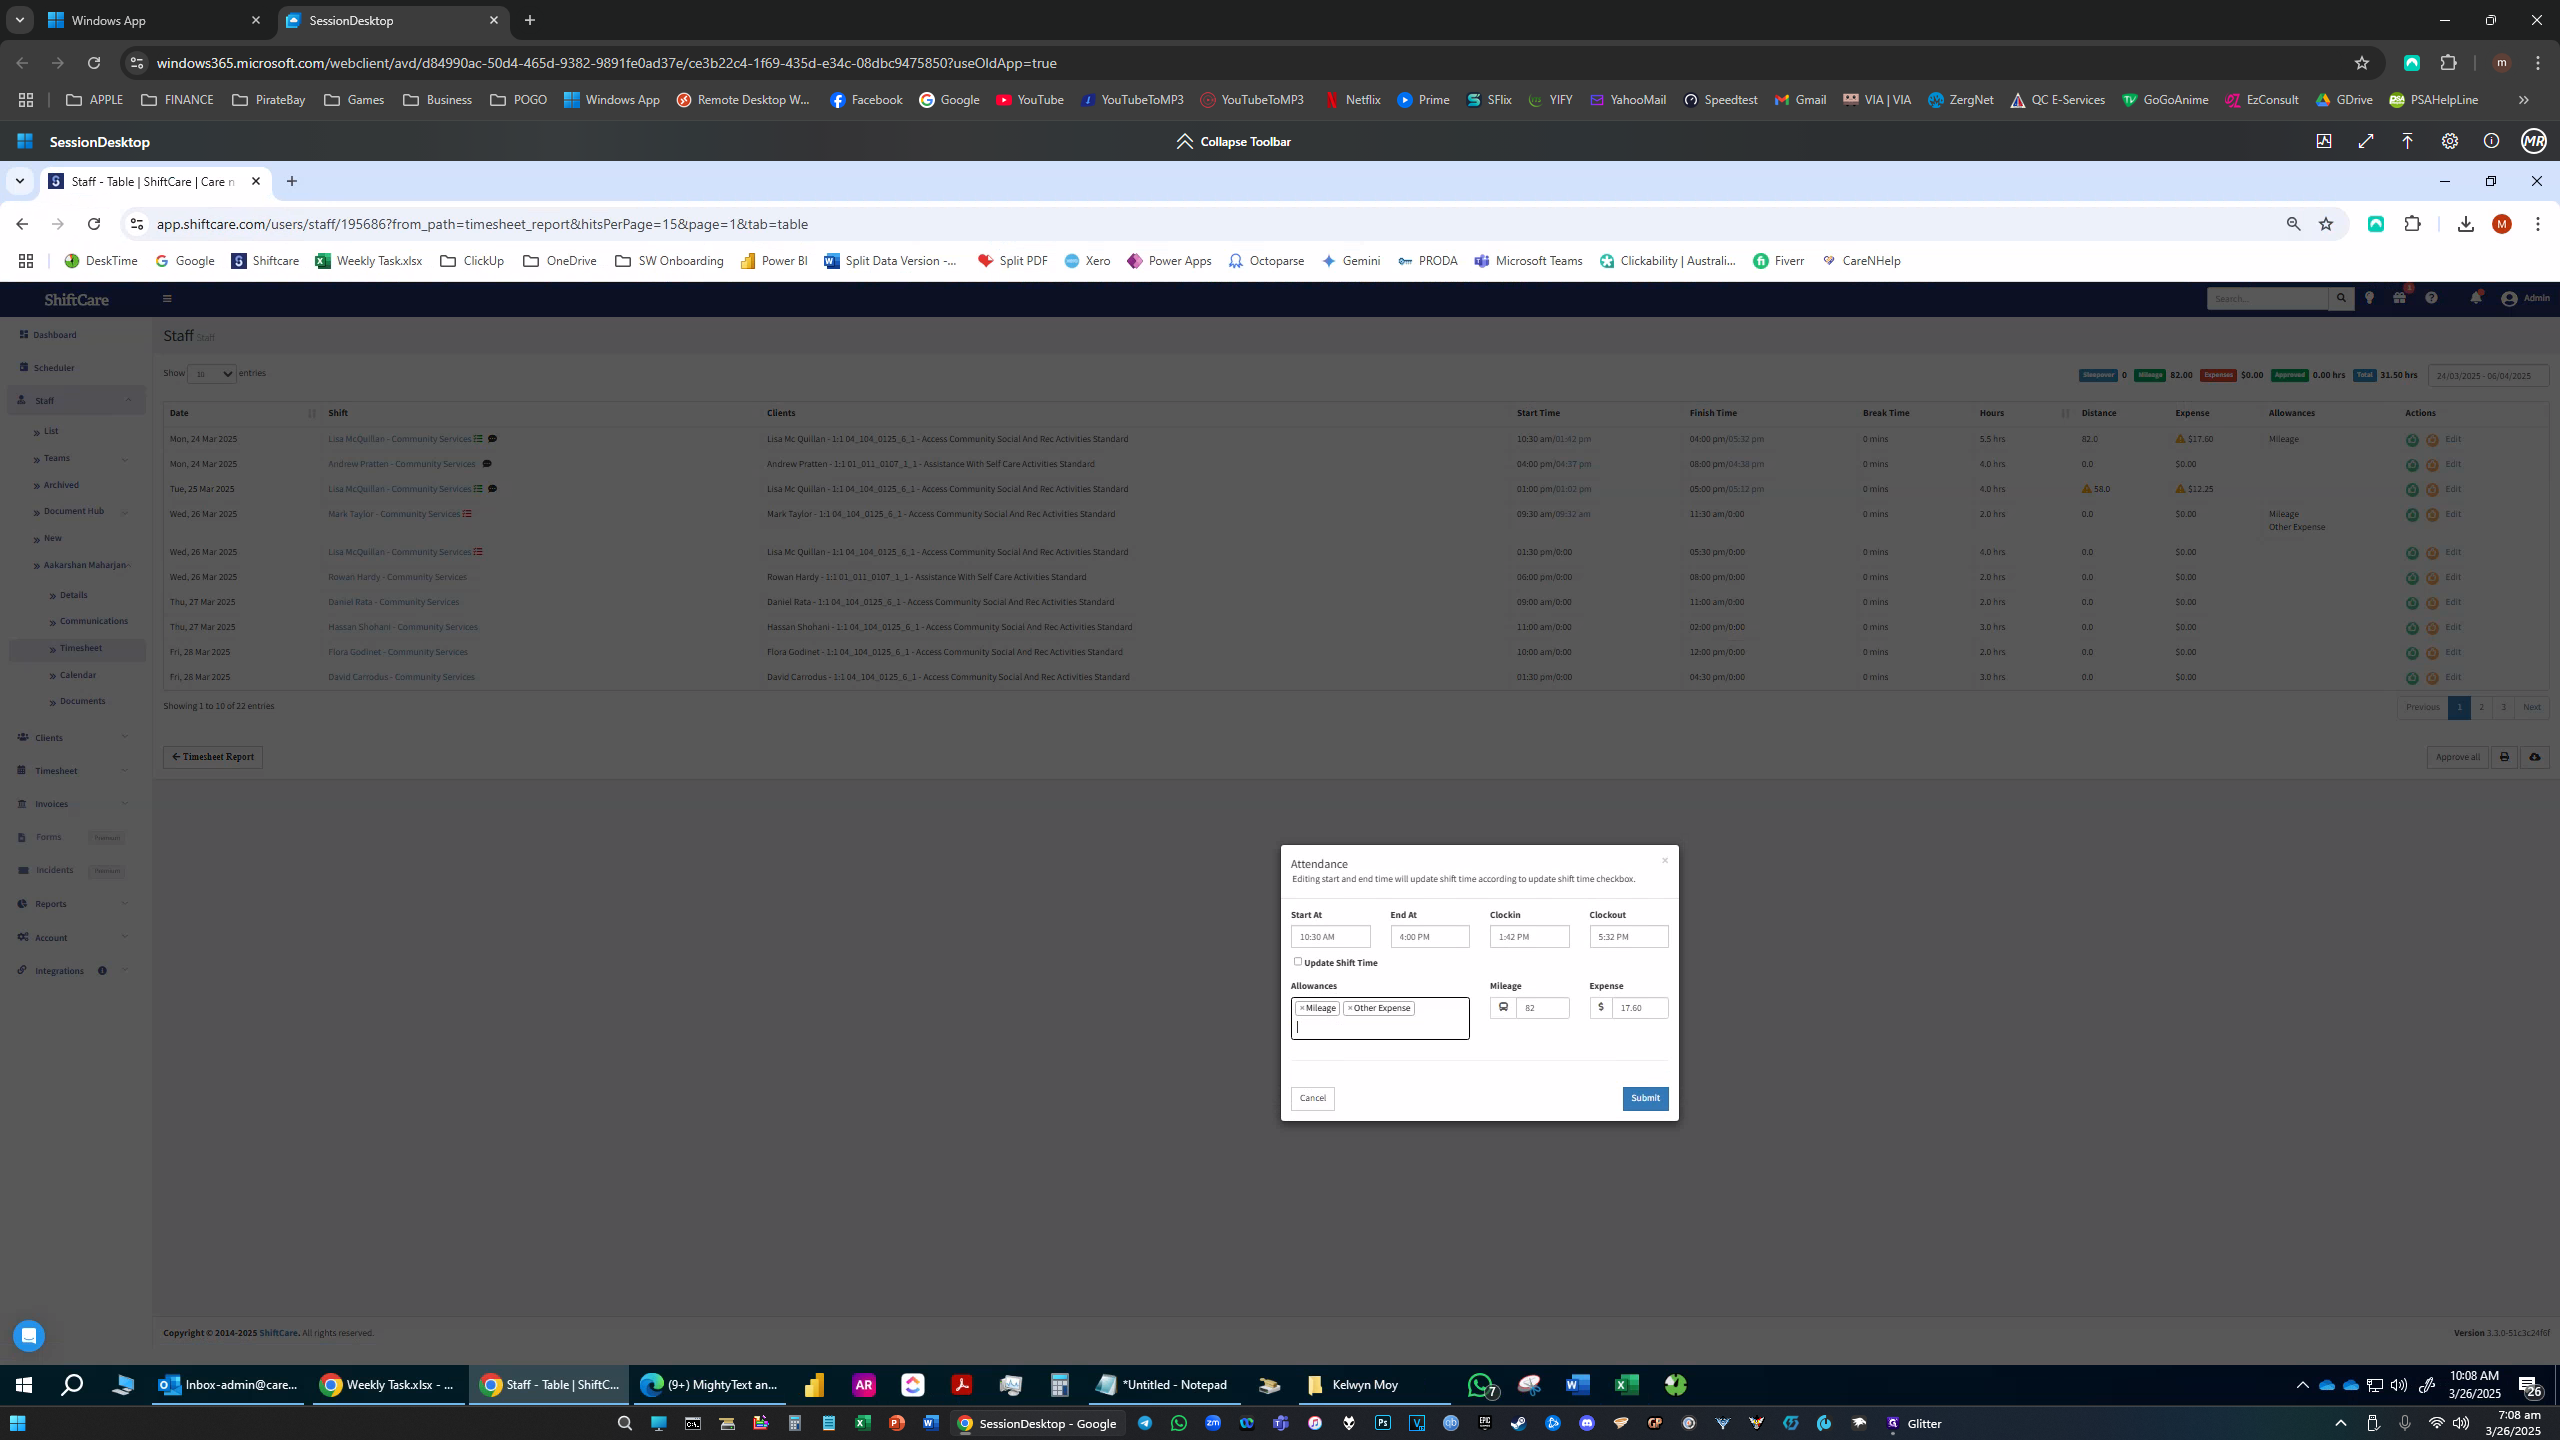
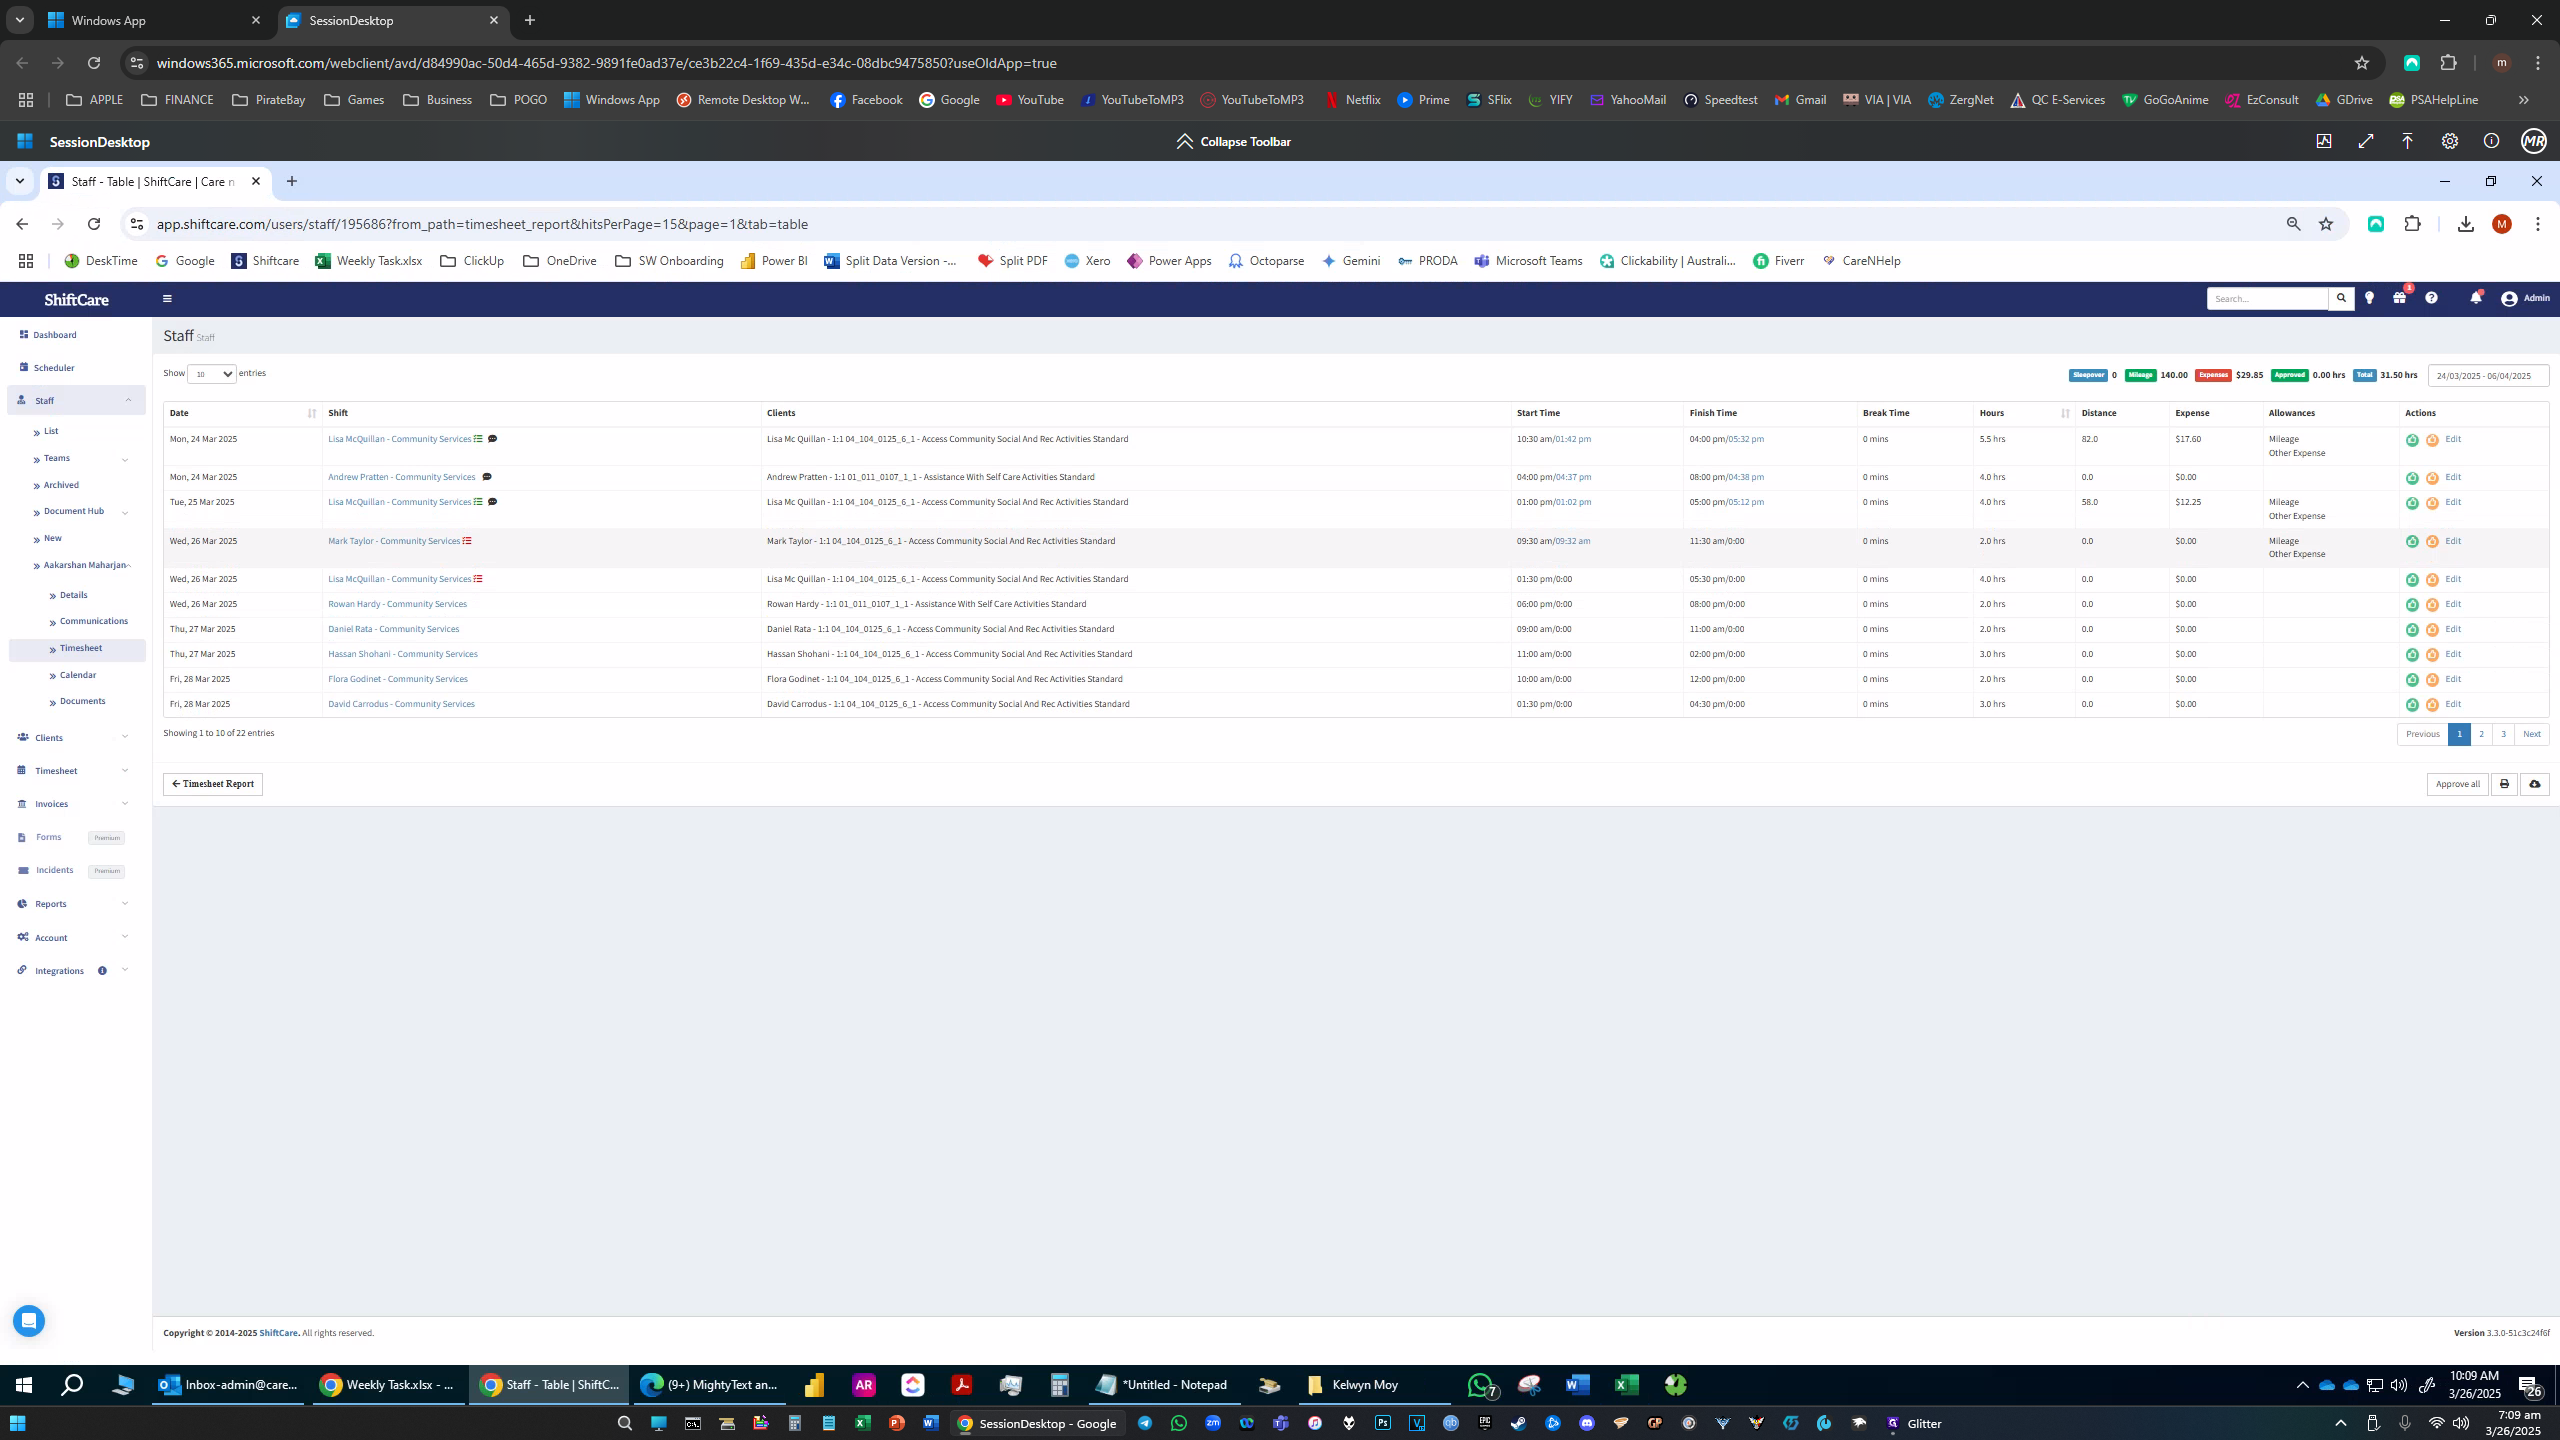
2. If the shift has mileage, put “mileage” in the allowance section. If it exceeds 80kms, we need to validate by checking the shift notes on where they went, and cross check with google maps if the mileage is close to the figure declared.

3. If the shift has expenses, put “other expenses” in the allowance section. We need to validate by checking if the receipt was uploaded by the support worker and if the amount declared is the same as what is in the receipt.

4. The support workers must have the notes finished by Tuesday 10AM. If the support worker failed to update the shift note within the given time, No further claims.

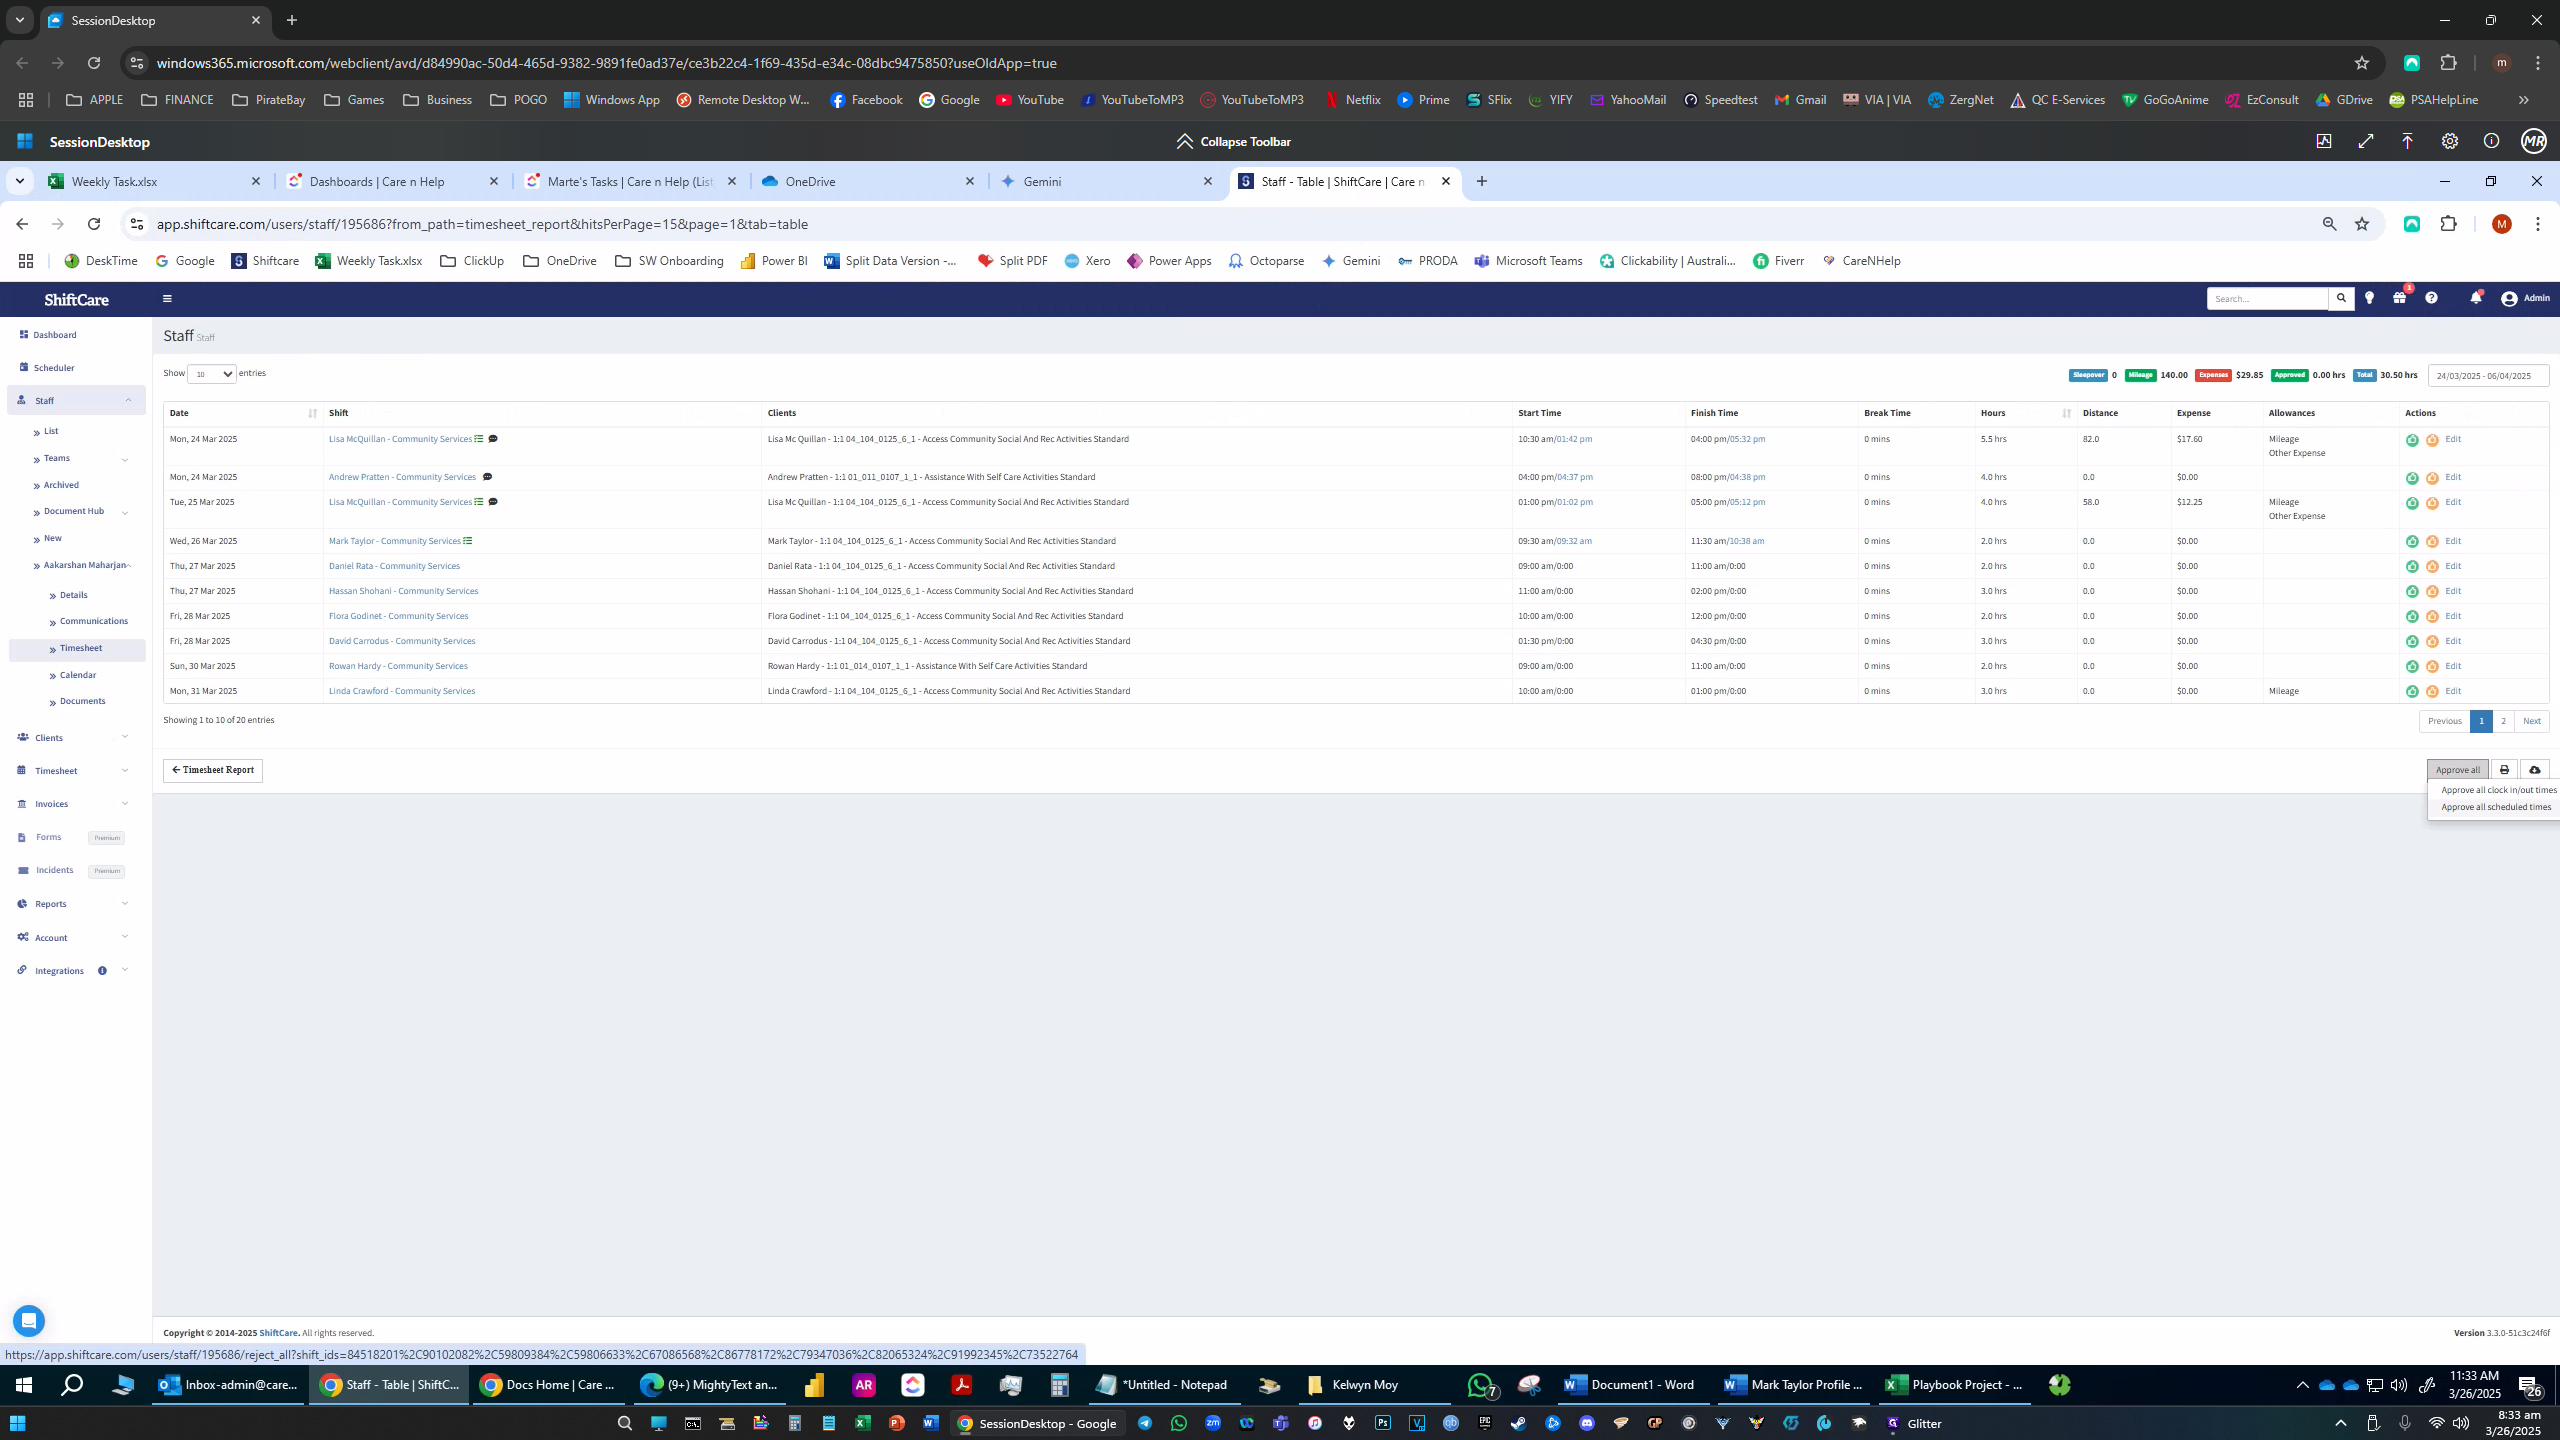
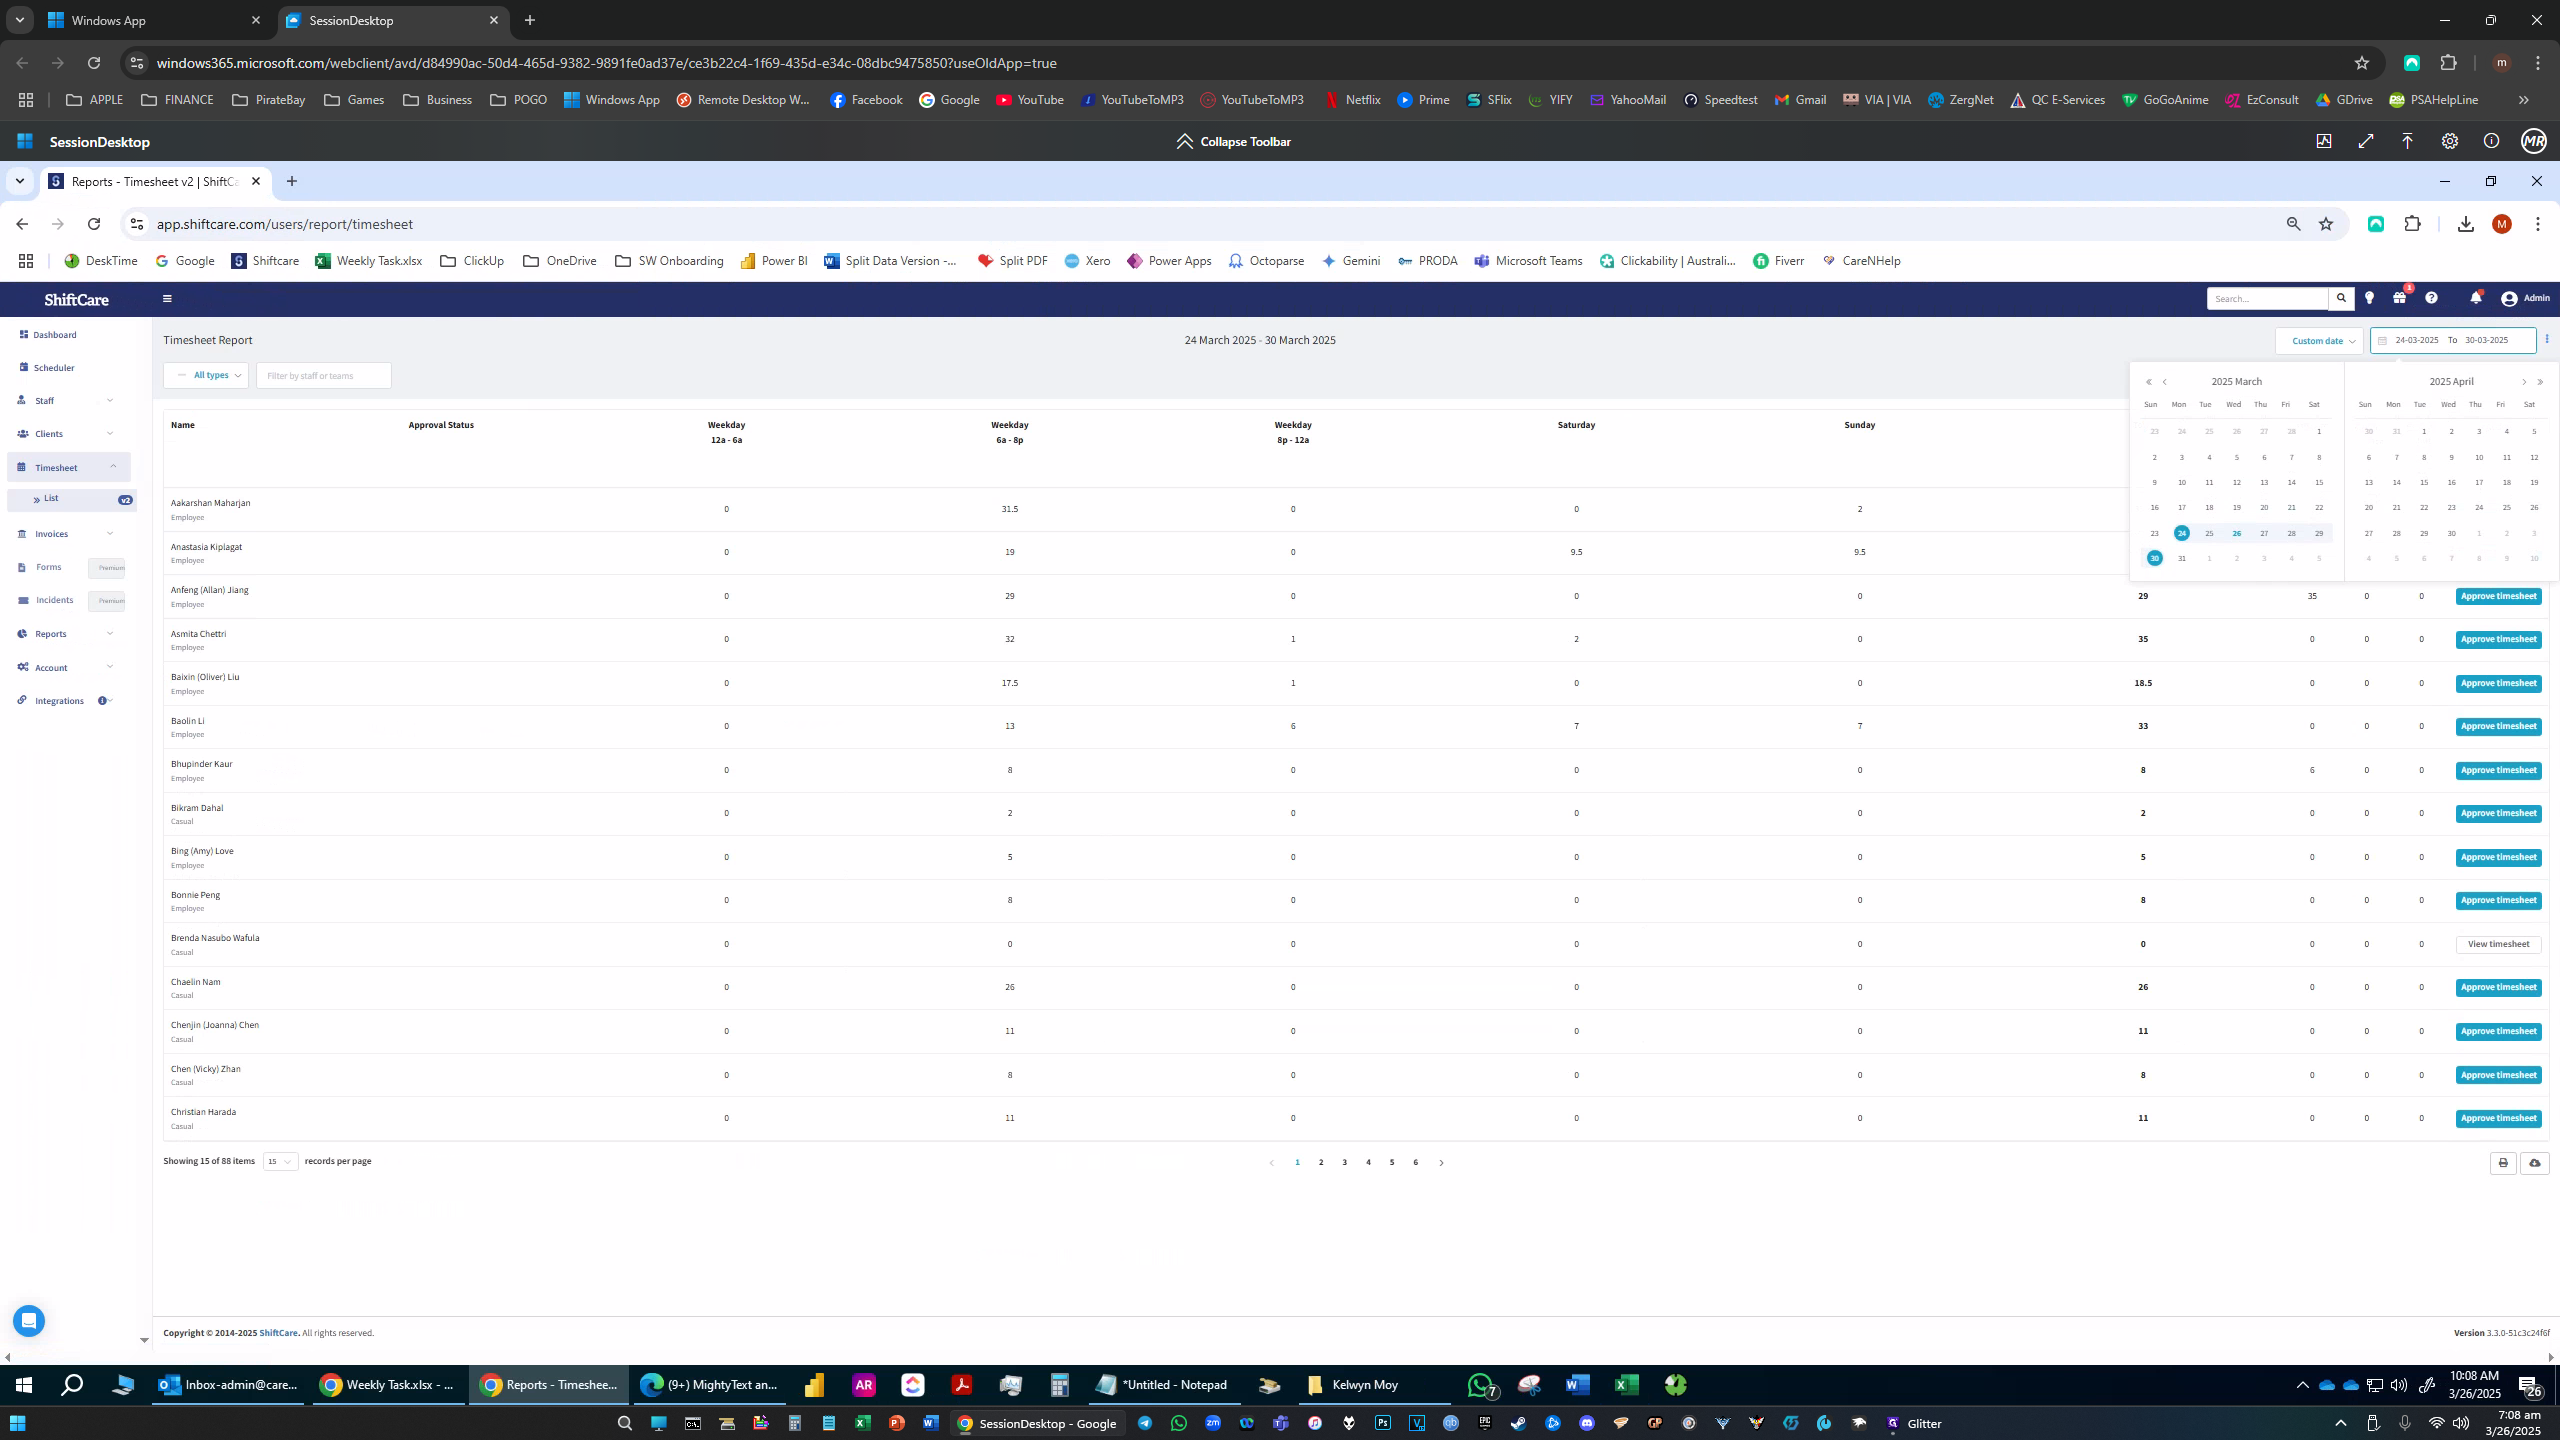
5. Payrun is for 2 weeks, normally starts on a Monday, and ends on the Sunday of the second week. Example: March 24 – April 6

  1. We can only approve the timesheet by approving the shift scheduled time.

Actual Steps:

1
Go to the website: Shiftcare <https://app.shiftcare.com/users/areas> Then click on "Timesheets"
Step #1: Go to the website: Shiftcare <https://app.shiftcare.com/users/areas> Then click on "Timesheets"
2
From there, on the left menu, Click on Timesheet > List
Step #2: From there, on the left menu, Click on Timesheet > List
3
Click on "This week" and you should be able to filter the dates in question
Step #3: Click on "This week" and you should be able to filter the dates in question
4
Click on "Custom date"
Step #4: Click on "Custom date"
5
Click on the date range
Step #5: Click on the date range
6
Choose the custom dates covering the Payrun coverage weeks.
Step #6: Choose the custom dates covering the Payrun coverage weeks.

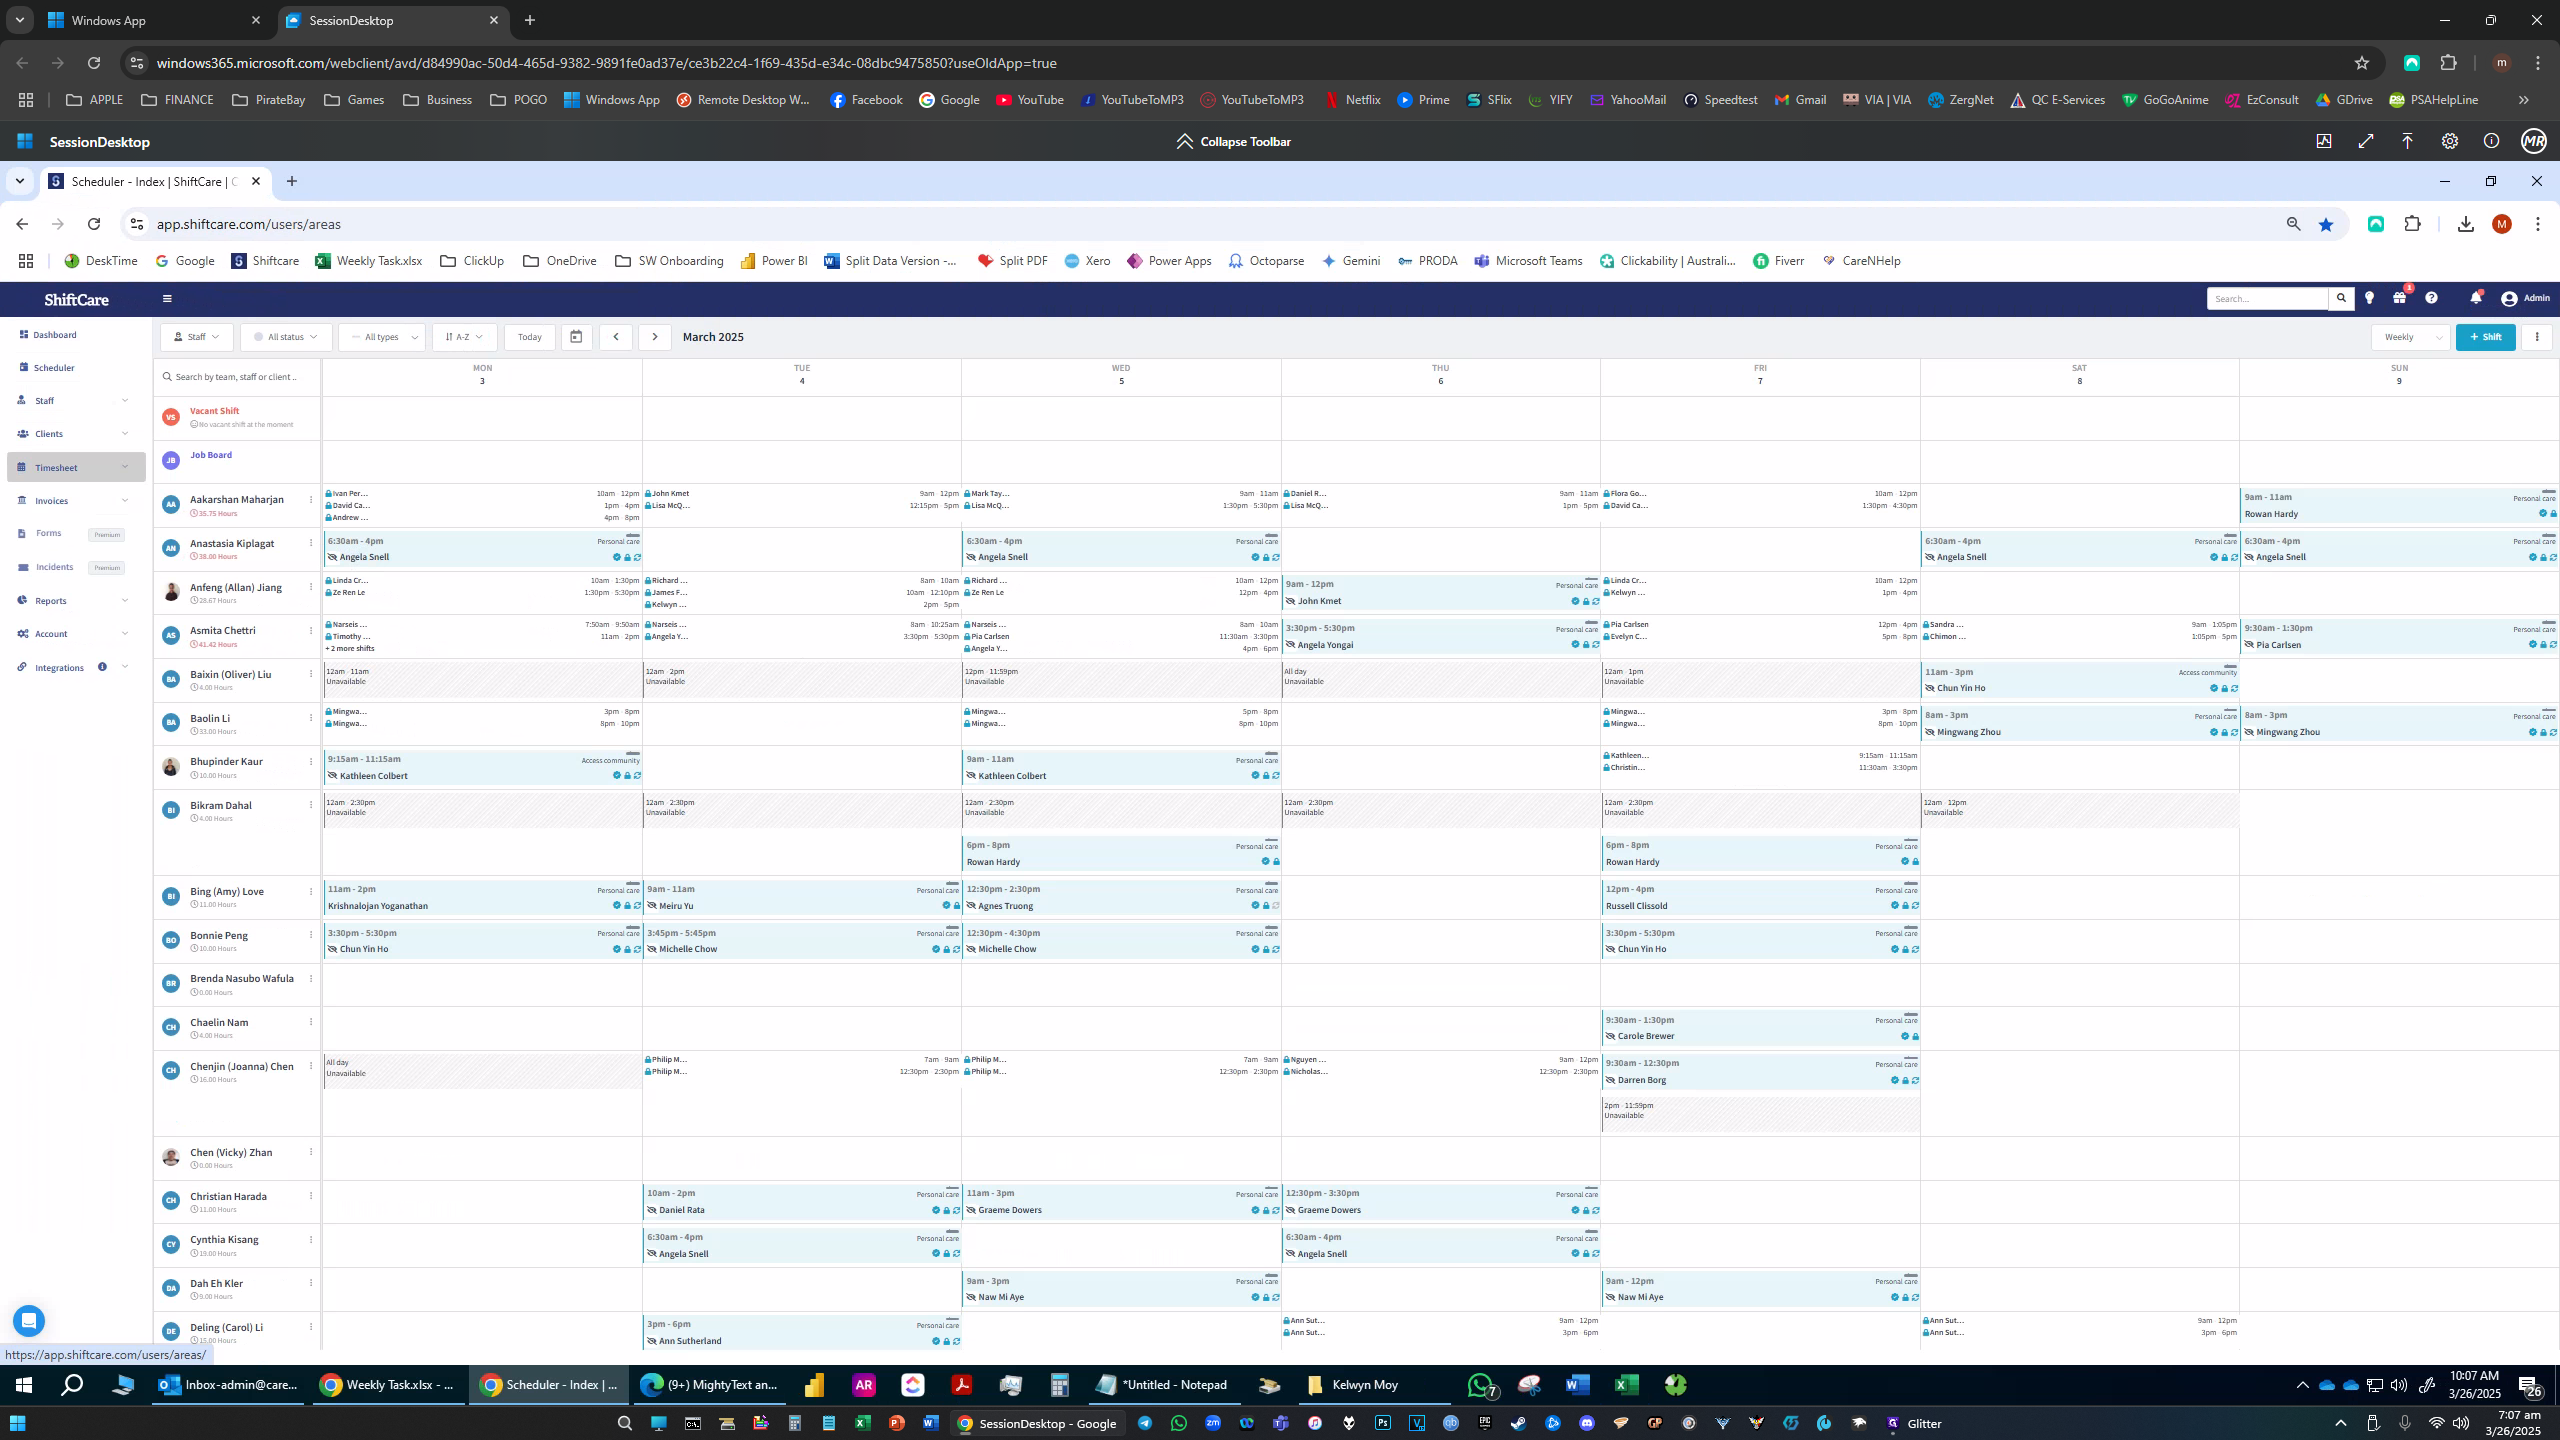
Let’s start with Aakarshan, since he is a good example as he has mileage and expenses.

7
Click on Aakarshan
Step #7: Click on Aakarshan
8
Click on "Edit"
Step #8: Click on "Edit"
9
Click on "Choose Allowances"
Step #9: Click on "Choose Allowances"
10
Choose "Mileage"
Step #10: Choose "Mileage"
11
Click on "Other Expense"
Step #11: Click on "Other Expense"
12
Click on "Submit"
Step #12: Click on "Submit"
13
You will notice that as you add the allowances, the exclamation point is gone.
Step #13: You will notice that as you add the allowances, the exclamation point is gone.
14
From this picture, you will see a bubble icon on some of the clients, this means there is a shift note saved for the shift. To check on the notes, click the client name. A pop up on the side will appear.
Step #14: From this picture, you will see a bubble icon on some of the clients, this means there is a shift note saved for the shift. To check on the notes, click the client name. A pop up on the side will appear.
15
Once the side pop up appears, Click on "View more"
Step #15: Once the side pop up appears, Click on "View more"
16
From the notes added, Click on "View more" to see the notes.
Step #16: From the notes added, Click on "View more" to see the notes.
17
To validate the expense, look for the expense then, Click on "View Attachment". It is important that the value matches the claimed expense.
Step #17: To validate the expense, look for the expense then, Click on "View Attachment". It is important that the value matches the claimed expense.
18
Once Validated, Click On Approve All on the Bottom Right, then "Approve Scheduled Times". Repeat this step for the rest of the employees.
Step #18: Once Validated, Click On Approve All on the Bottom Right, then "Approve Scheduled Times". Repeat this step for the rest of the employees.

Approving Timesheet Guideline