
Enhancing Automation with Our New Engine
Discover how our new automation engine is revolutionizing ticket management by allowing offering event-based rules, and providing advanced configurations.
In this guide, we'll learn how to navigate and set up the new automation engine that is replacing the existing ticket automation system. For early adopters, this update allows you to run both the old and new automation simultaneously, providing flexibility during the transition. We'll cover how to manage rules to avoid conflicts, utilize the run once feature, and understand the different event types that trigger actions. This guide will help you smoothly transition your rules from the old system to the new one, ensuring efficient ticket management.
Let's get started
Here's a quick update on our automation engine, which is replacing our existing ticket automation. To get started, go to the admin tab and click on automation. You should know that you can run both the old and new ticket automation simultaneously. This means you can have a rule running in both systems. When setting this up, especially for a beta test, ensure you don't have conflicting rules or duplicate rules running.
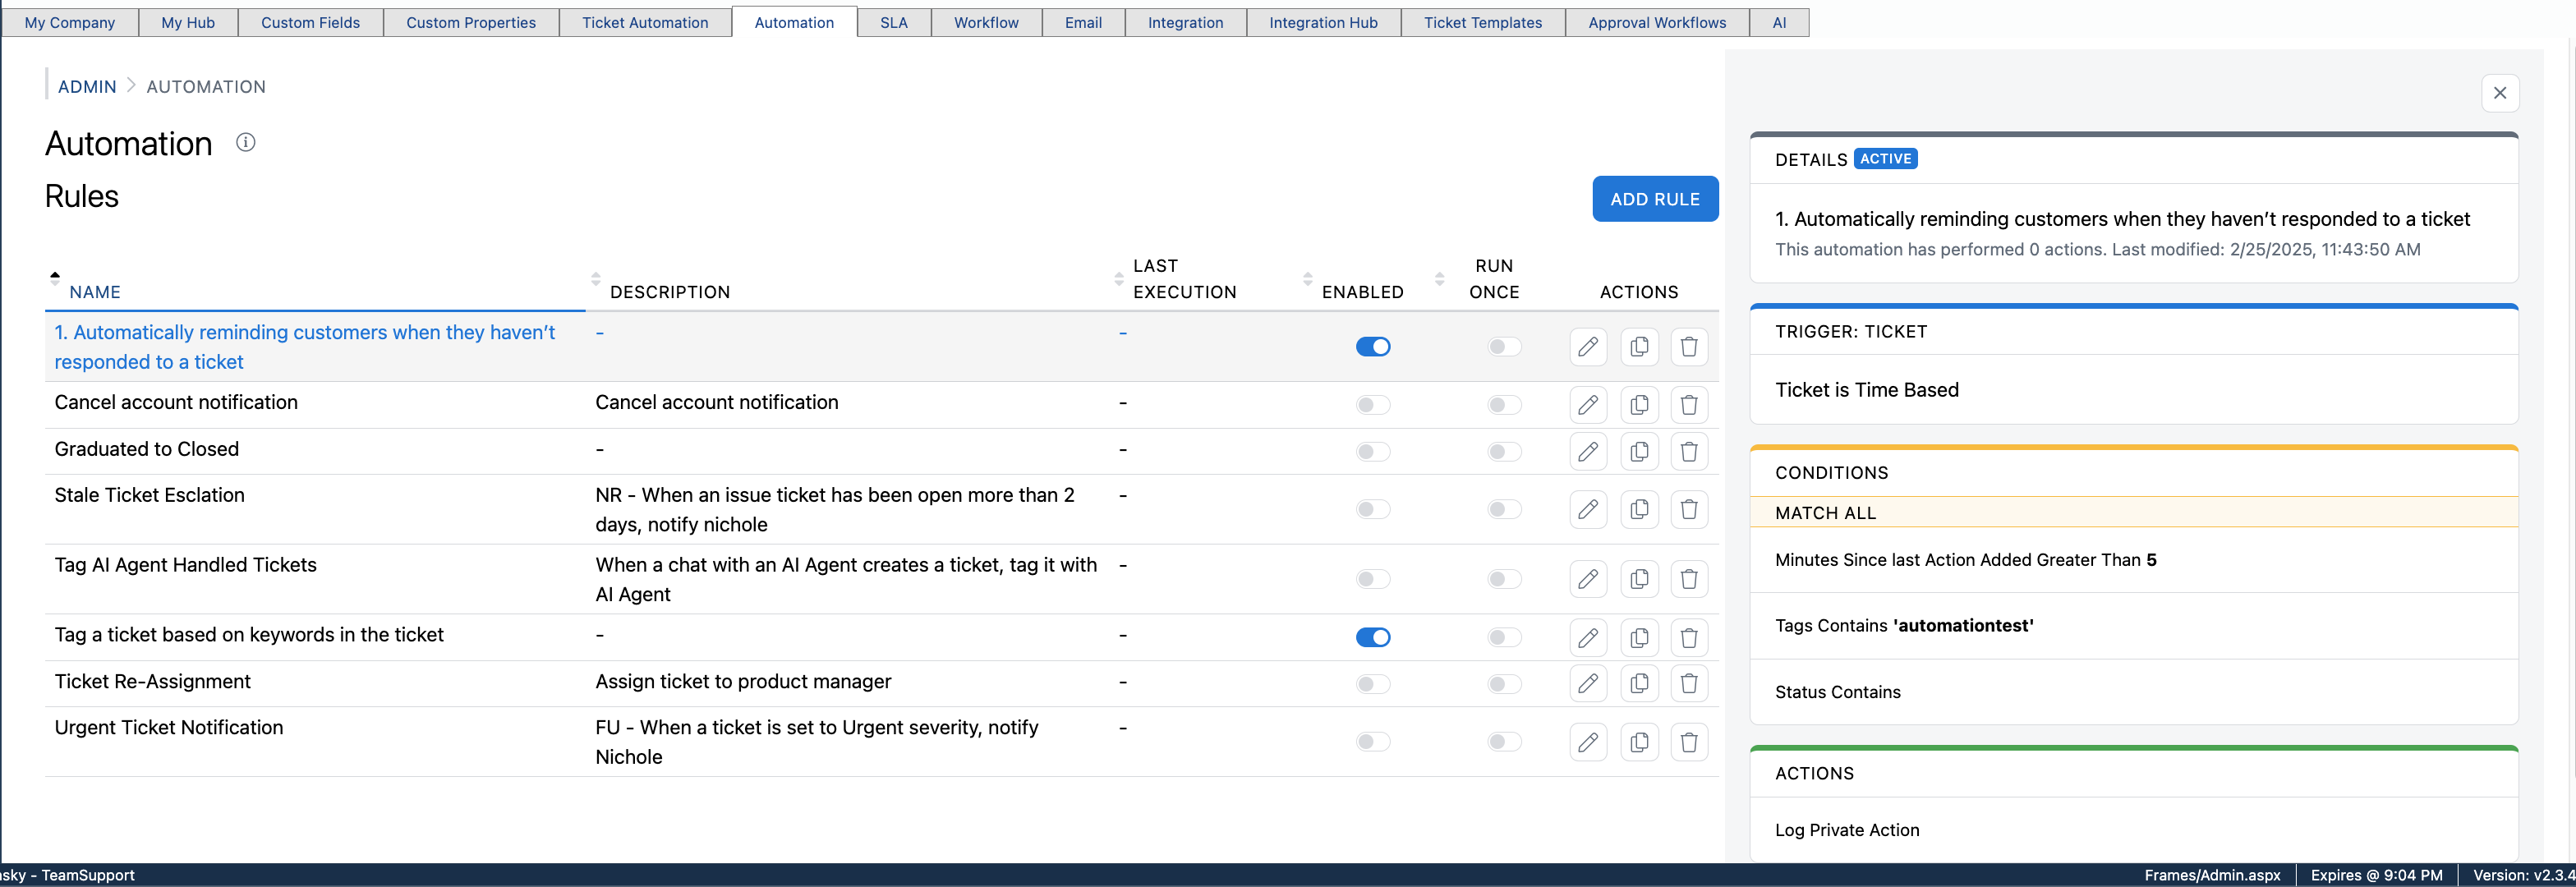
We recommend that if you want to replace an existing ticket automation rule with a new one, you should first disable the old rule. Then, activate the new rule and test it. If it works, you can gradually transfer your rules, one by one, from the old system. You can always disable the new rule if necessary. When you access the new automation, the first page will display your automation rules. This page lists all the rules you have set up. Clicking on a rule provides a quick preview in a flyout panel, showing how the rule is configured.
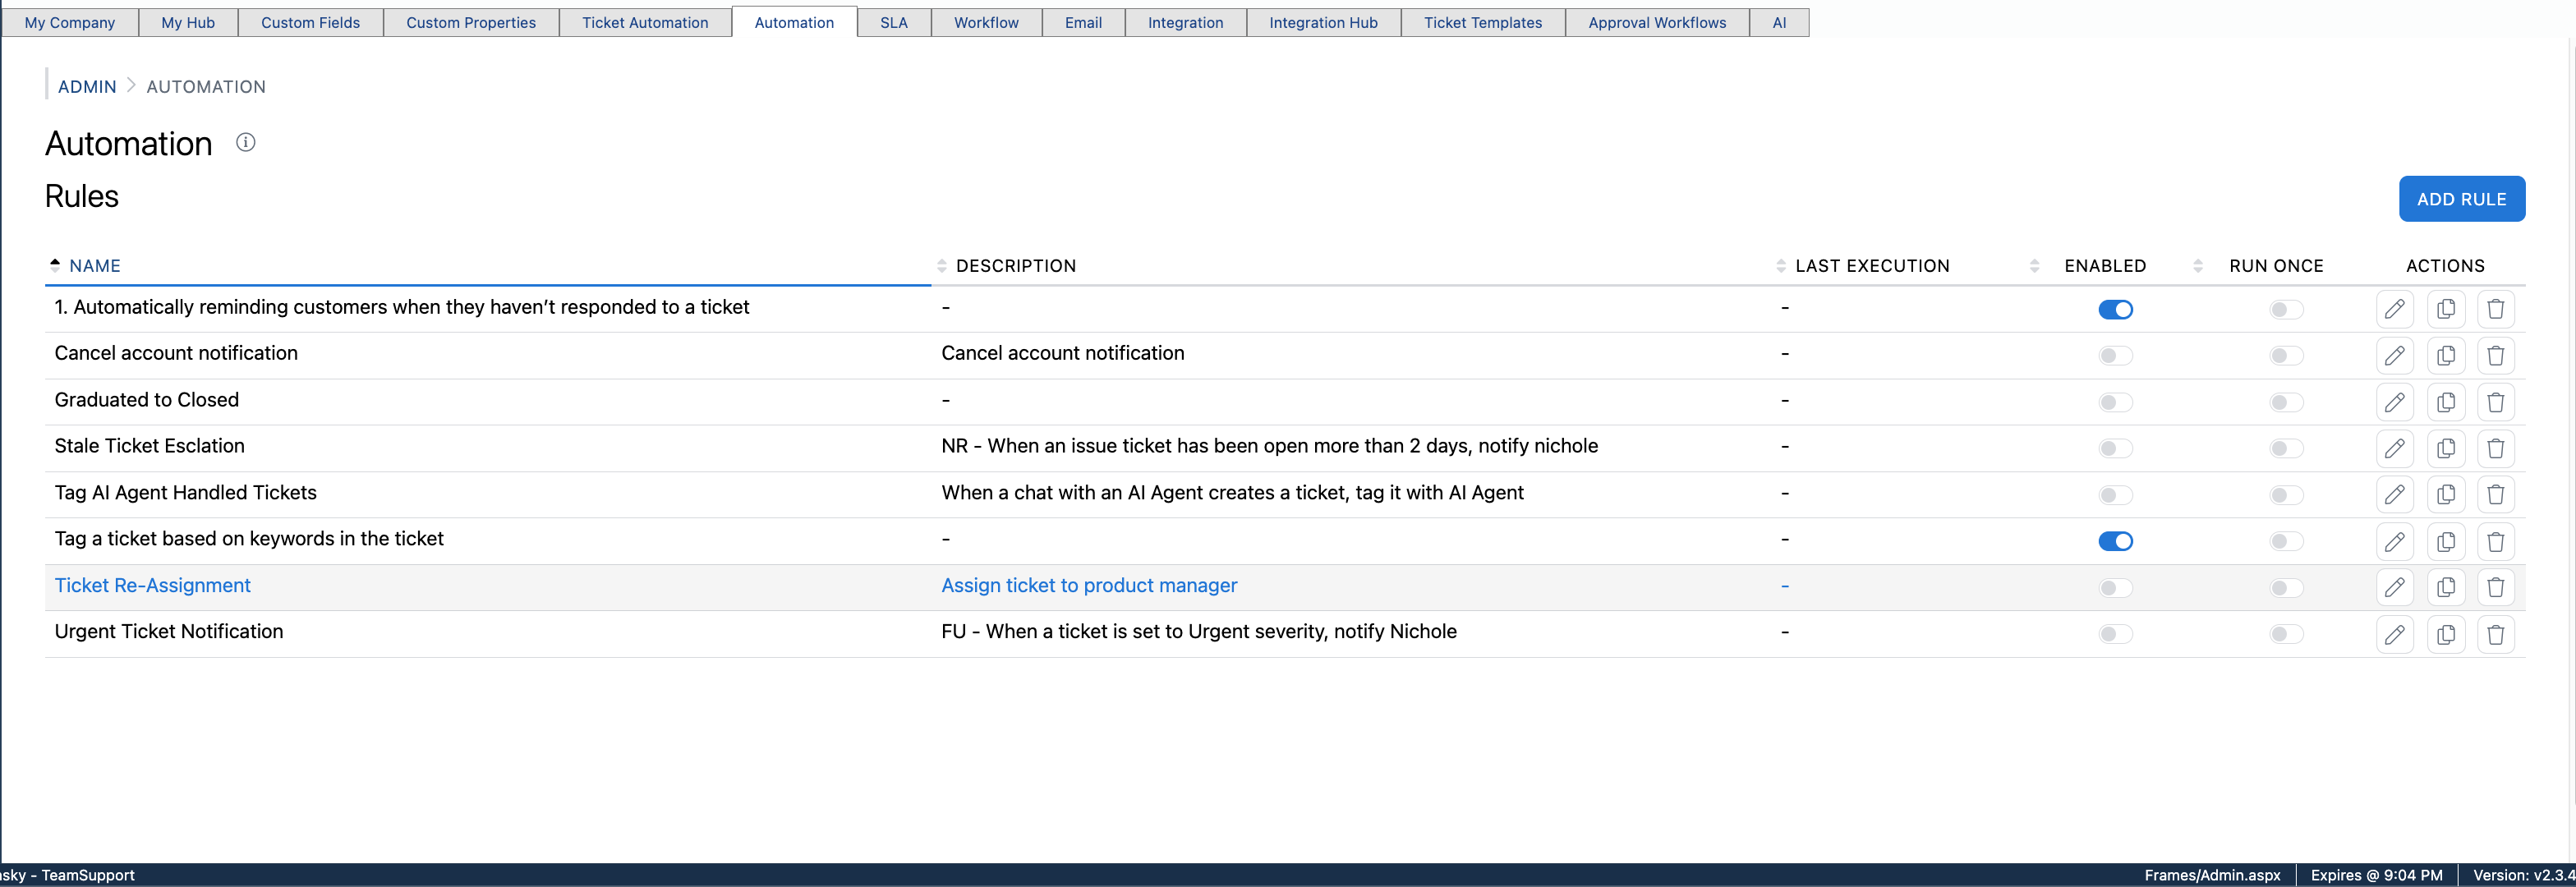
On the home page, you can edit basic rule configuration options. You also have the option to run the rule once, which we will cover. Additionally, there are some basic administrative functions.
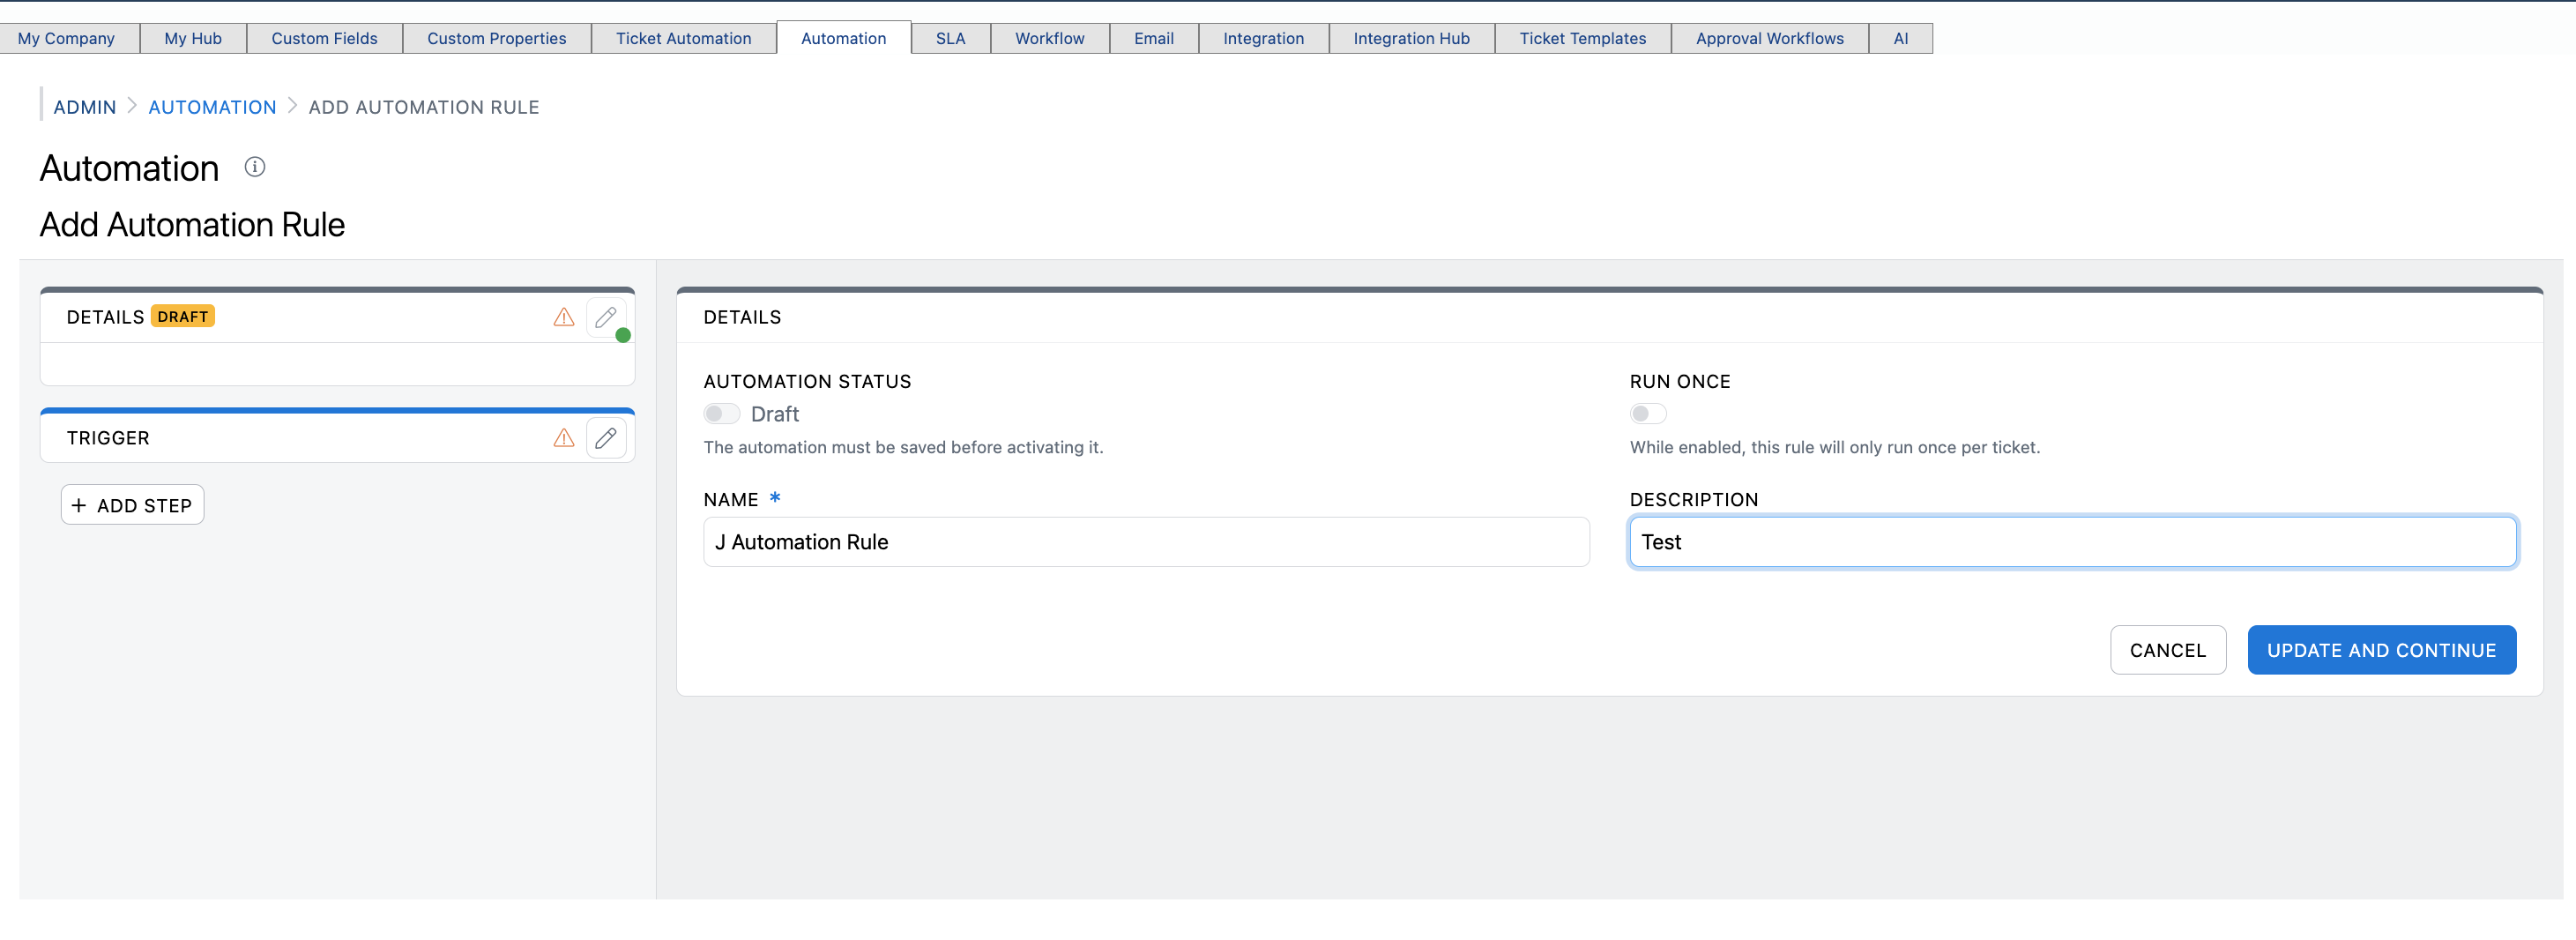
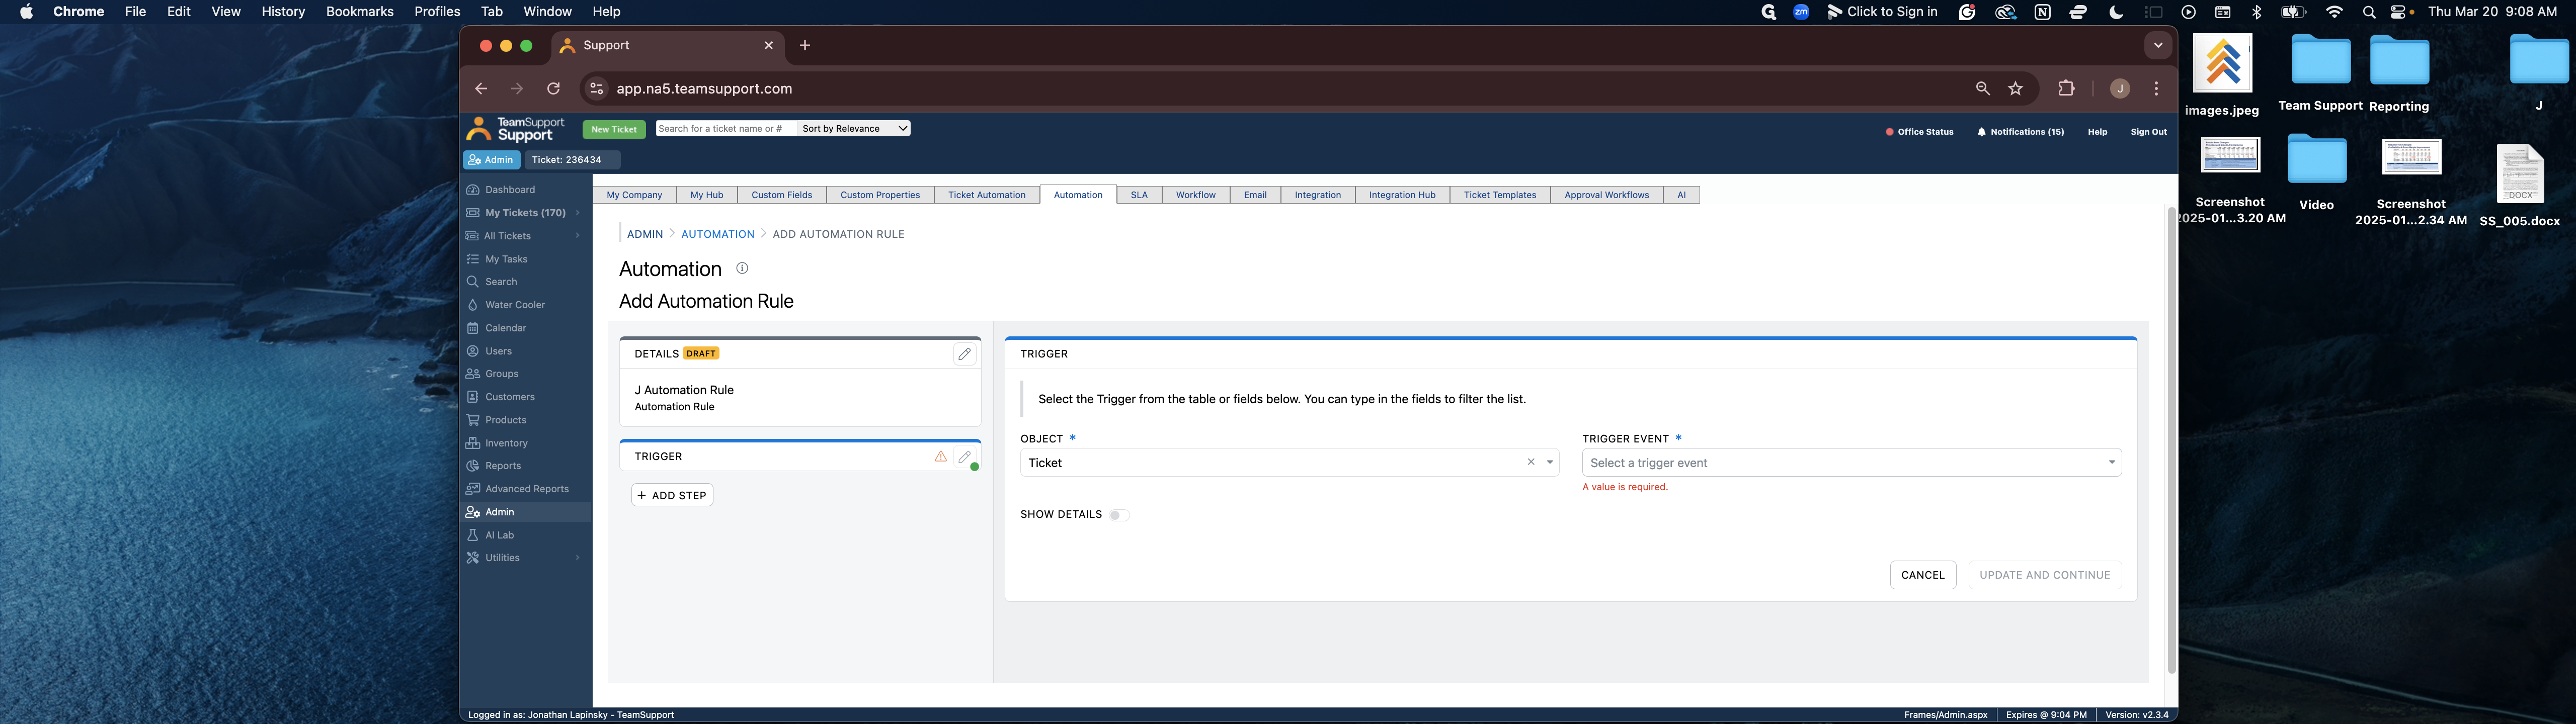
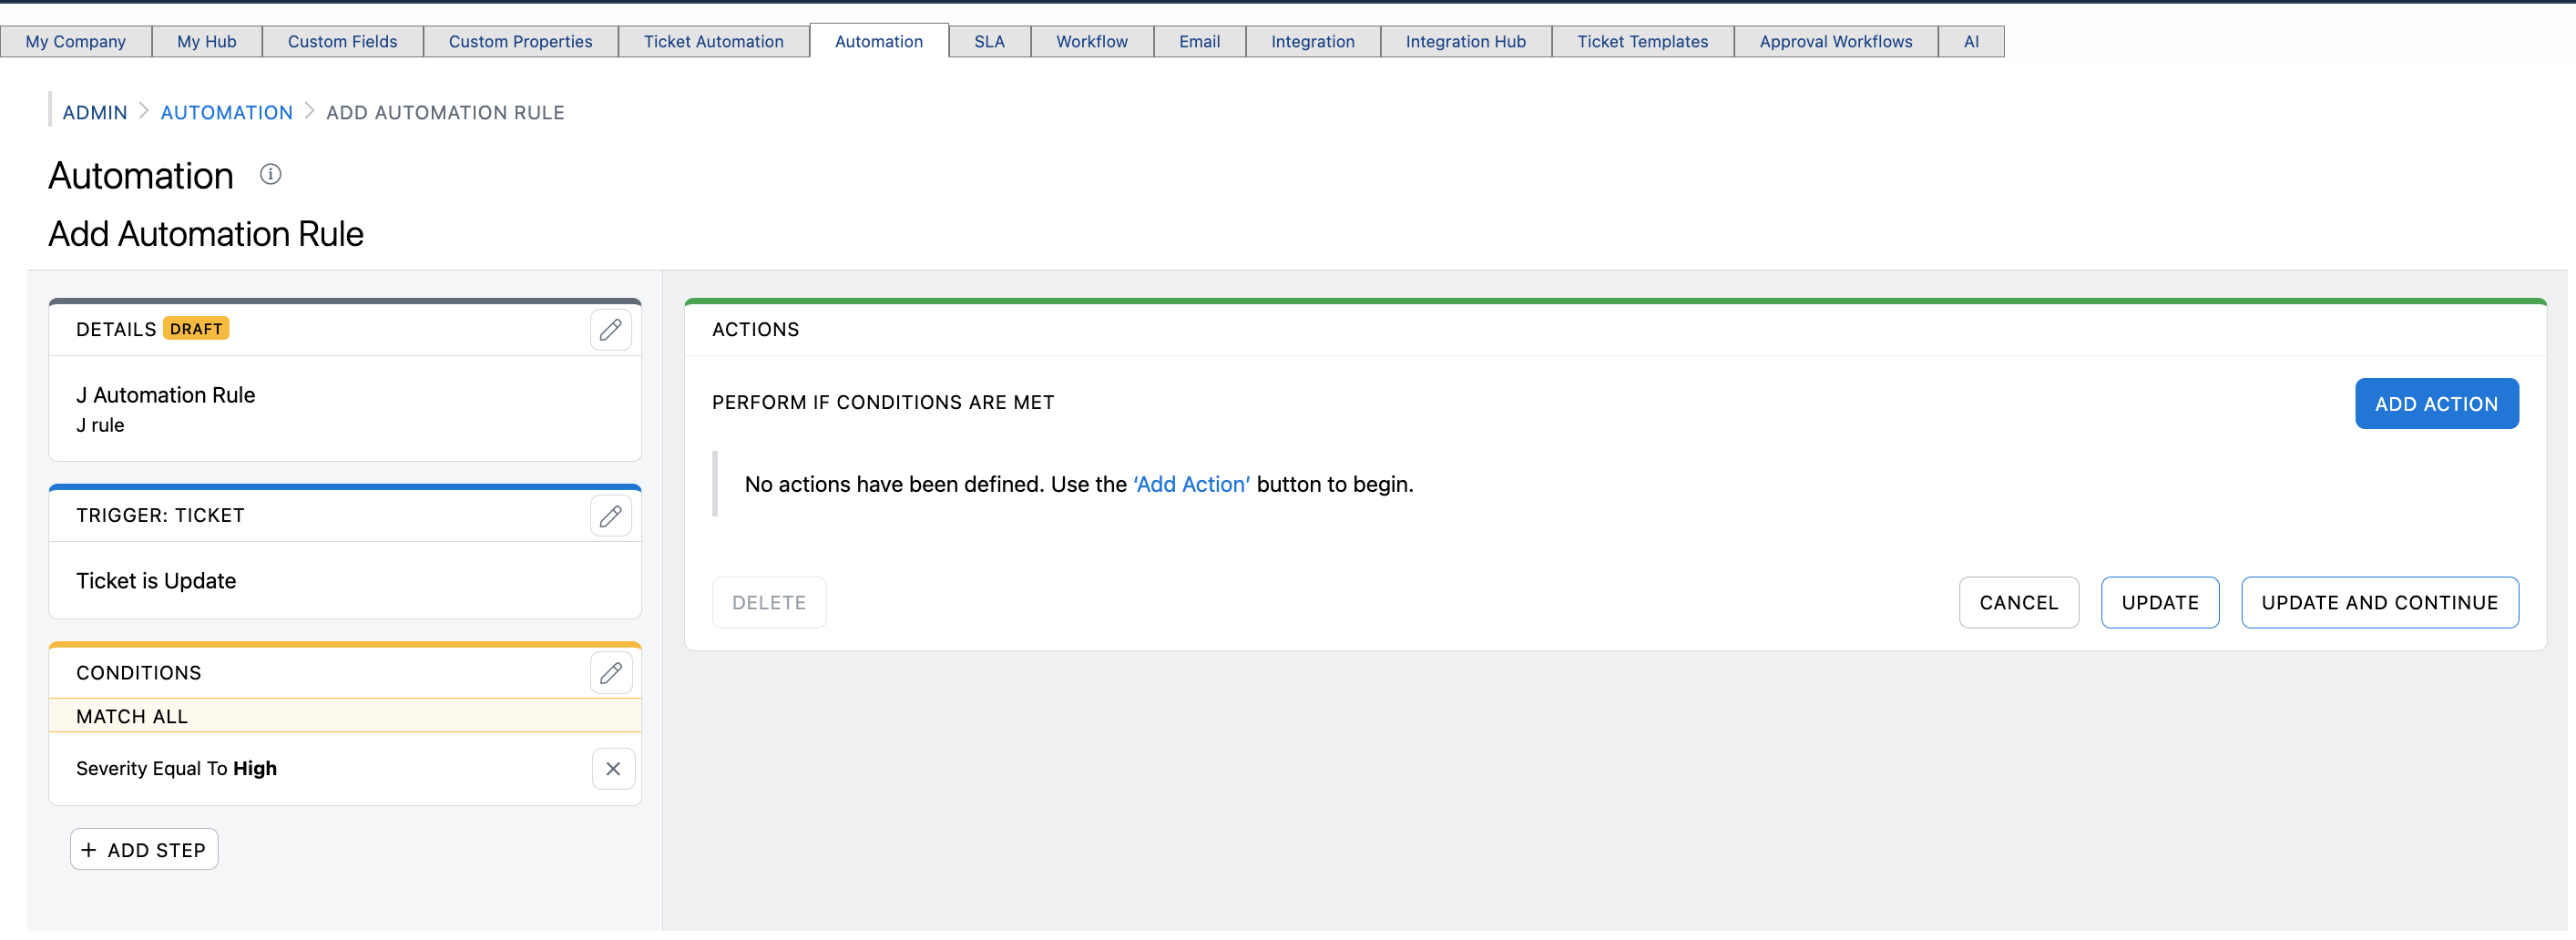
When adding a rule, there are four common elements in rules engines. First, you have the details, which serve as the administrative part. Next is the trigger, the event that initiates the automation to evaluate conditions. Next you have conditions. Finally, you have the actions.
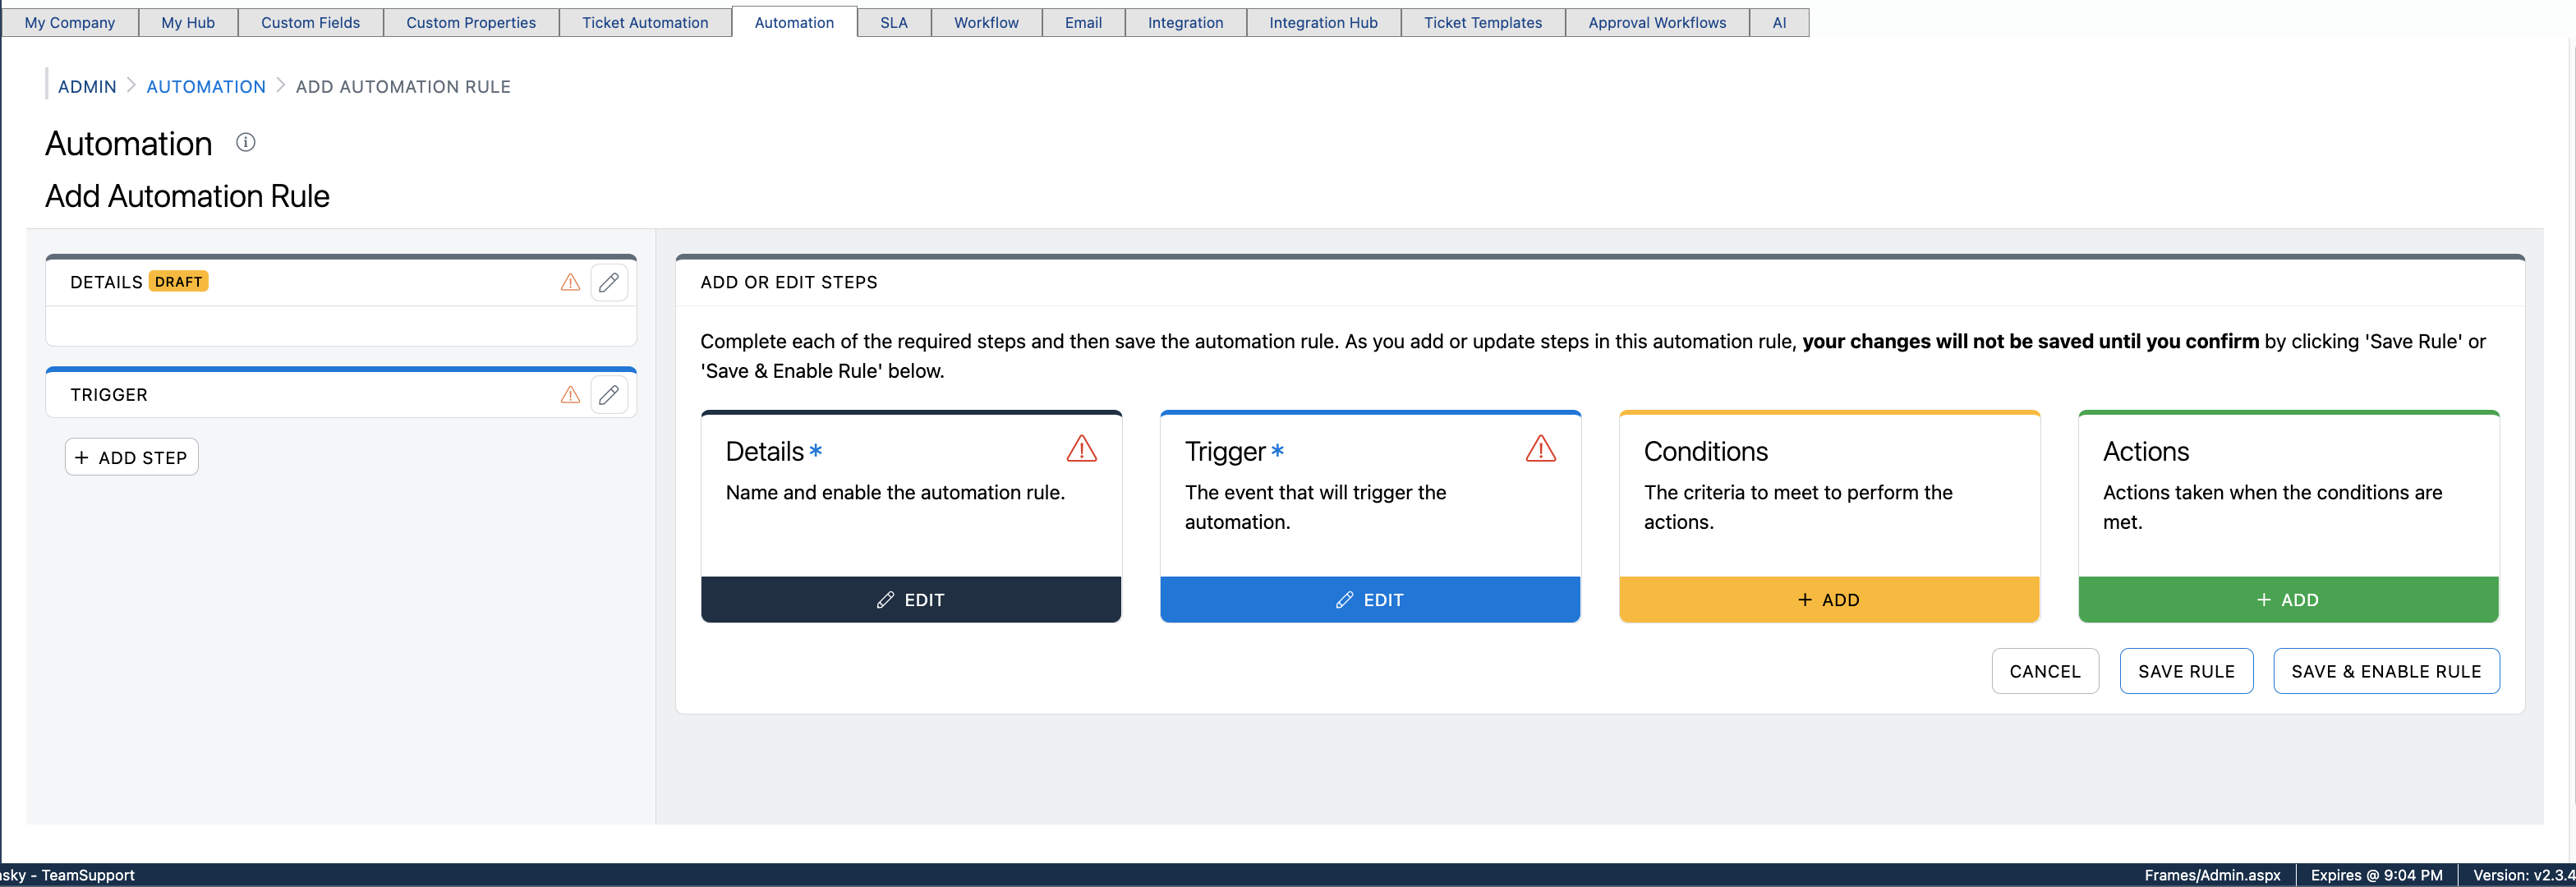

One of the main features on the details step is the "Run Once" option.
The new automation is event-based, meaning it runs whenever a ticket meets the criteria of a specific rule. When a ticket and event match the conditions, and you select this option, your actions will only run once. They will not run again. If you turn this option off, the actions will run multiple times whenever the conditions are met. There are different use cases for both options, but if you want it to run only once, you can toggle this setting on this screen.
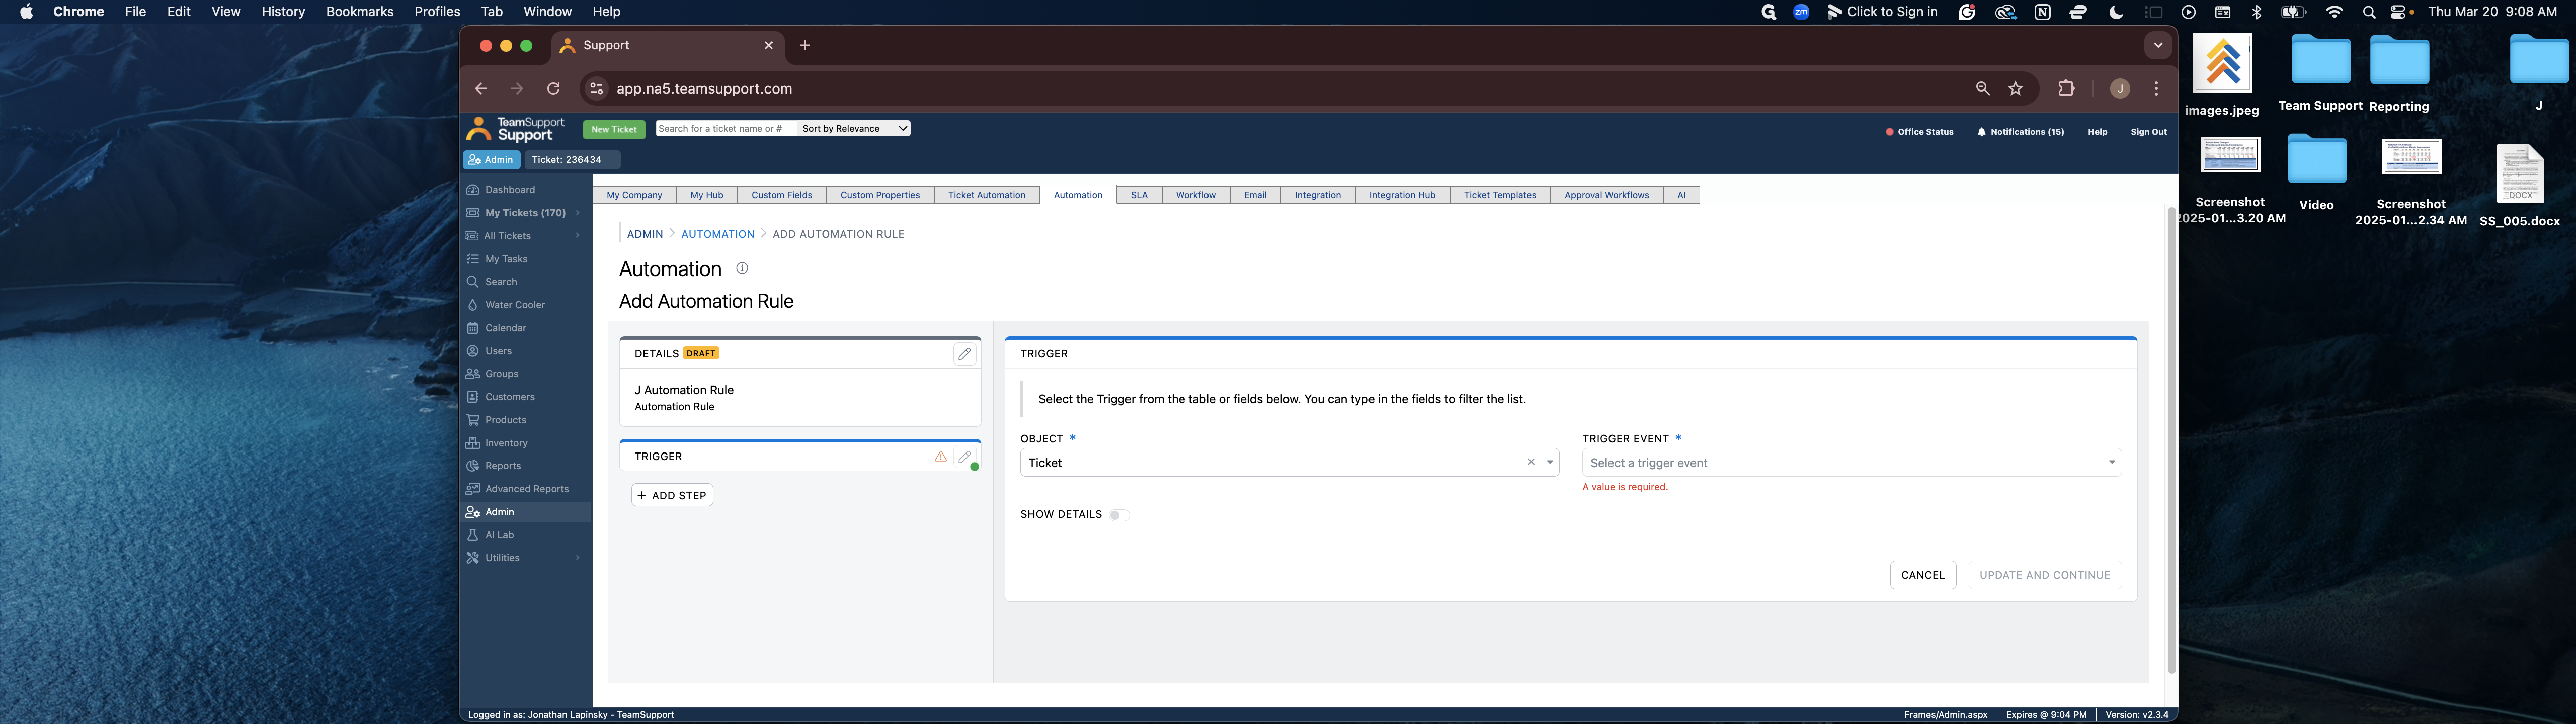
First you select the object. Currently, we are focused on the Ticket Object. In the future, we will also include customers and products and additional objects in the platform.
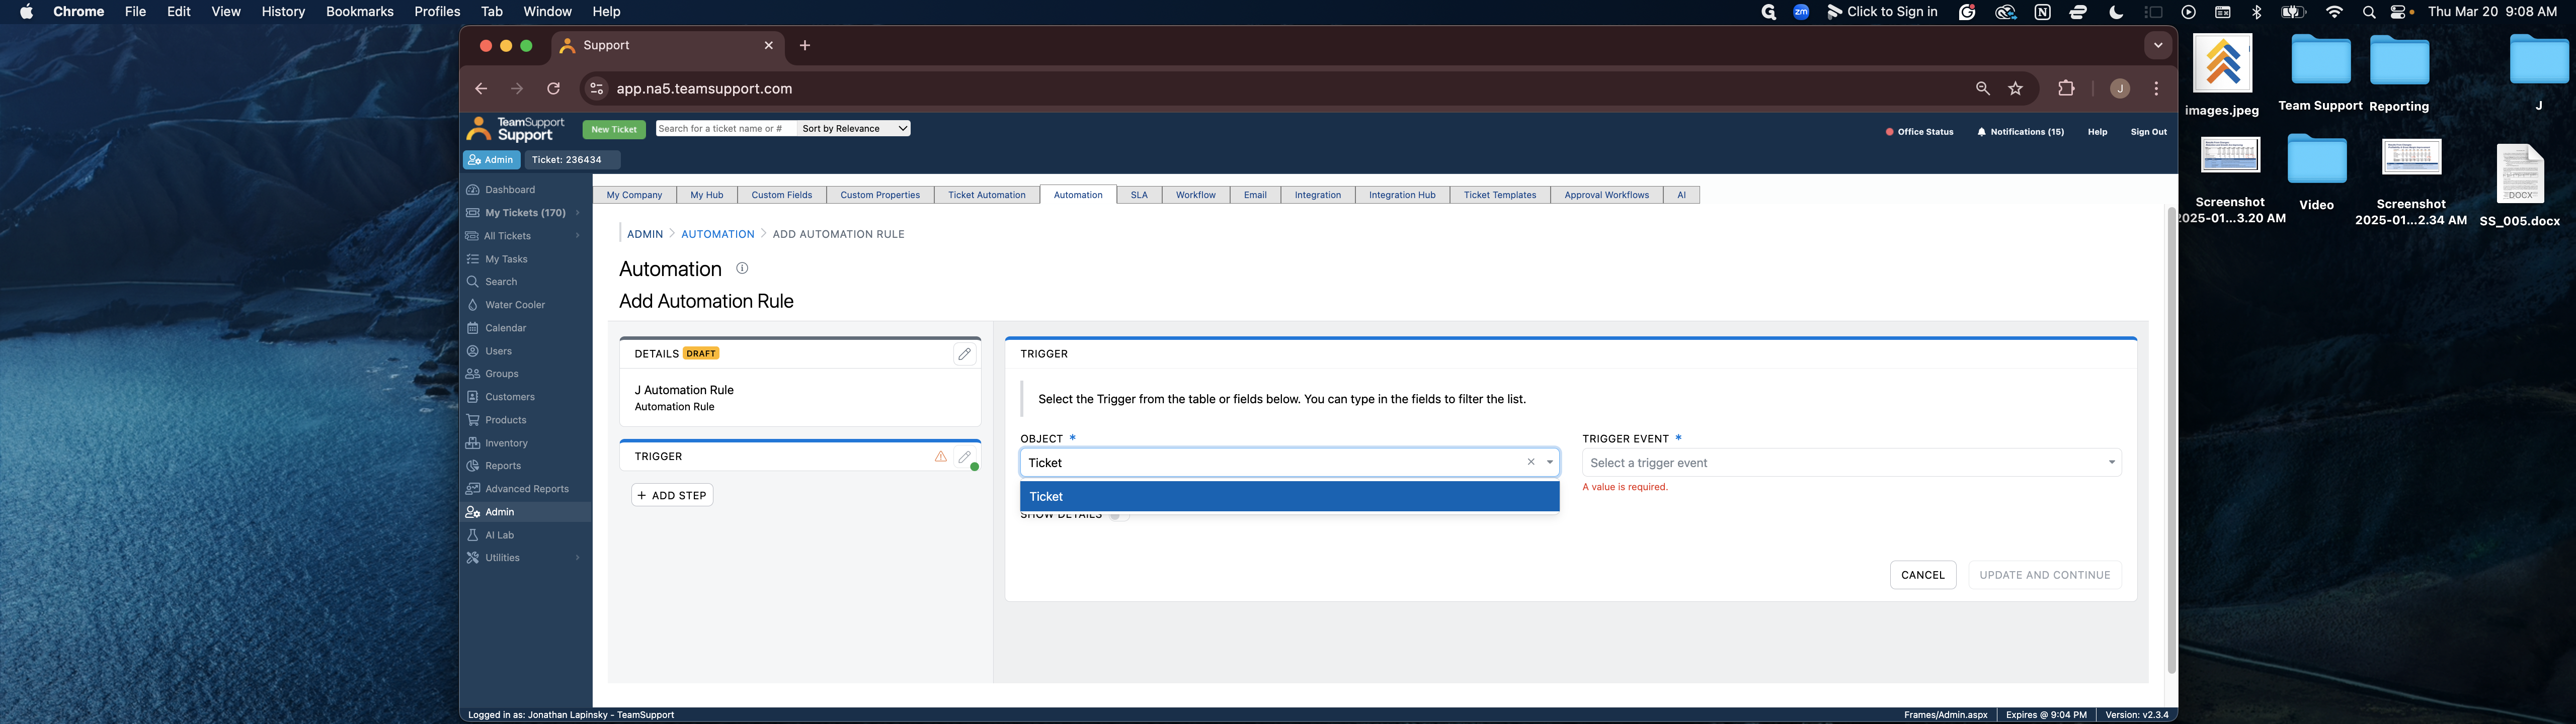
Next is the events. Here's a brief explanation of events.
Create Event
The "create" event monitors whenever a new ticket is created. When a new ticket is created, if the ticket meets any conditions set by your rules it will fire the corresponding actions. "Create" simply refers to the creation of a ticket.
Update Event
The "update" event happens whenever a ticket is updated. This includes any field changes, comments or meta data updates. When an update occurs to a ticket, the rules engine checks the conditions you've set in your rules. If a ticket has been recently updated, and it matches these conditions, it triggers the corresponding actions.
Time Based Event
Time based. The best way to describe this is as "time elapsed". For example, if a customer has not responded to a ticket in five days and certain conditions are met on the ticket, an action is performed. This applies to other scenarios such as days since the first response. Whenever you are waiting for a specific time period to pass for a rule to trigger, it is considered a time-based event.
Let's use for update this example.
Here are your conditions. This basic rule states that anytime a ticket is updated and matches either all or any of these conditions, specific actions should be triggered.
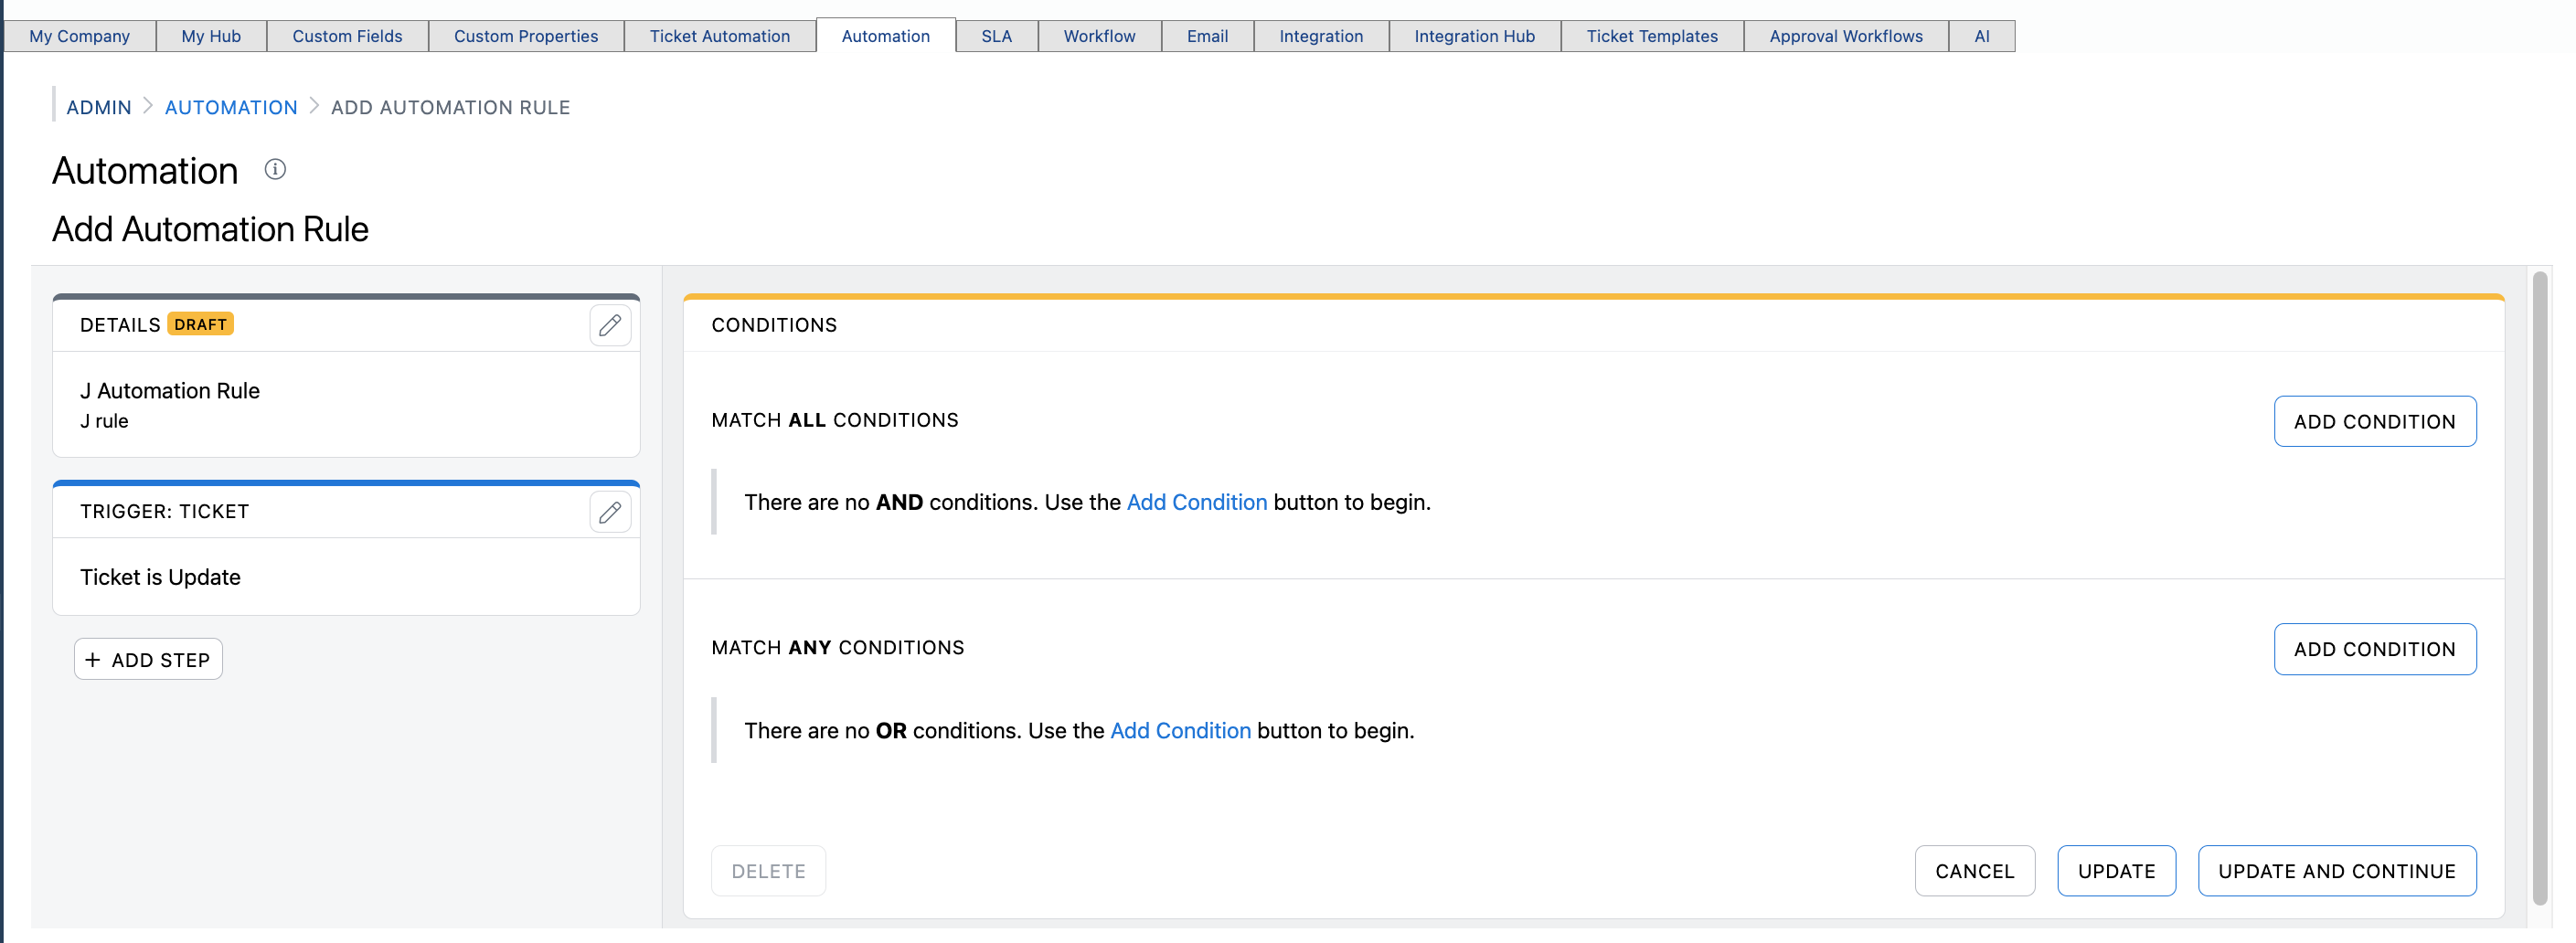
We are focusing on tickets. If a ticket is updated, you can choose any of the ticket fields as conditions. If these field conditions match, then the rules will fire.
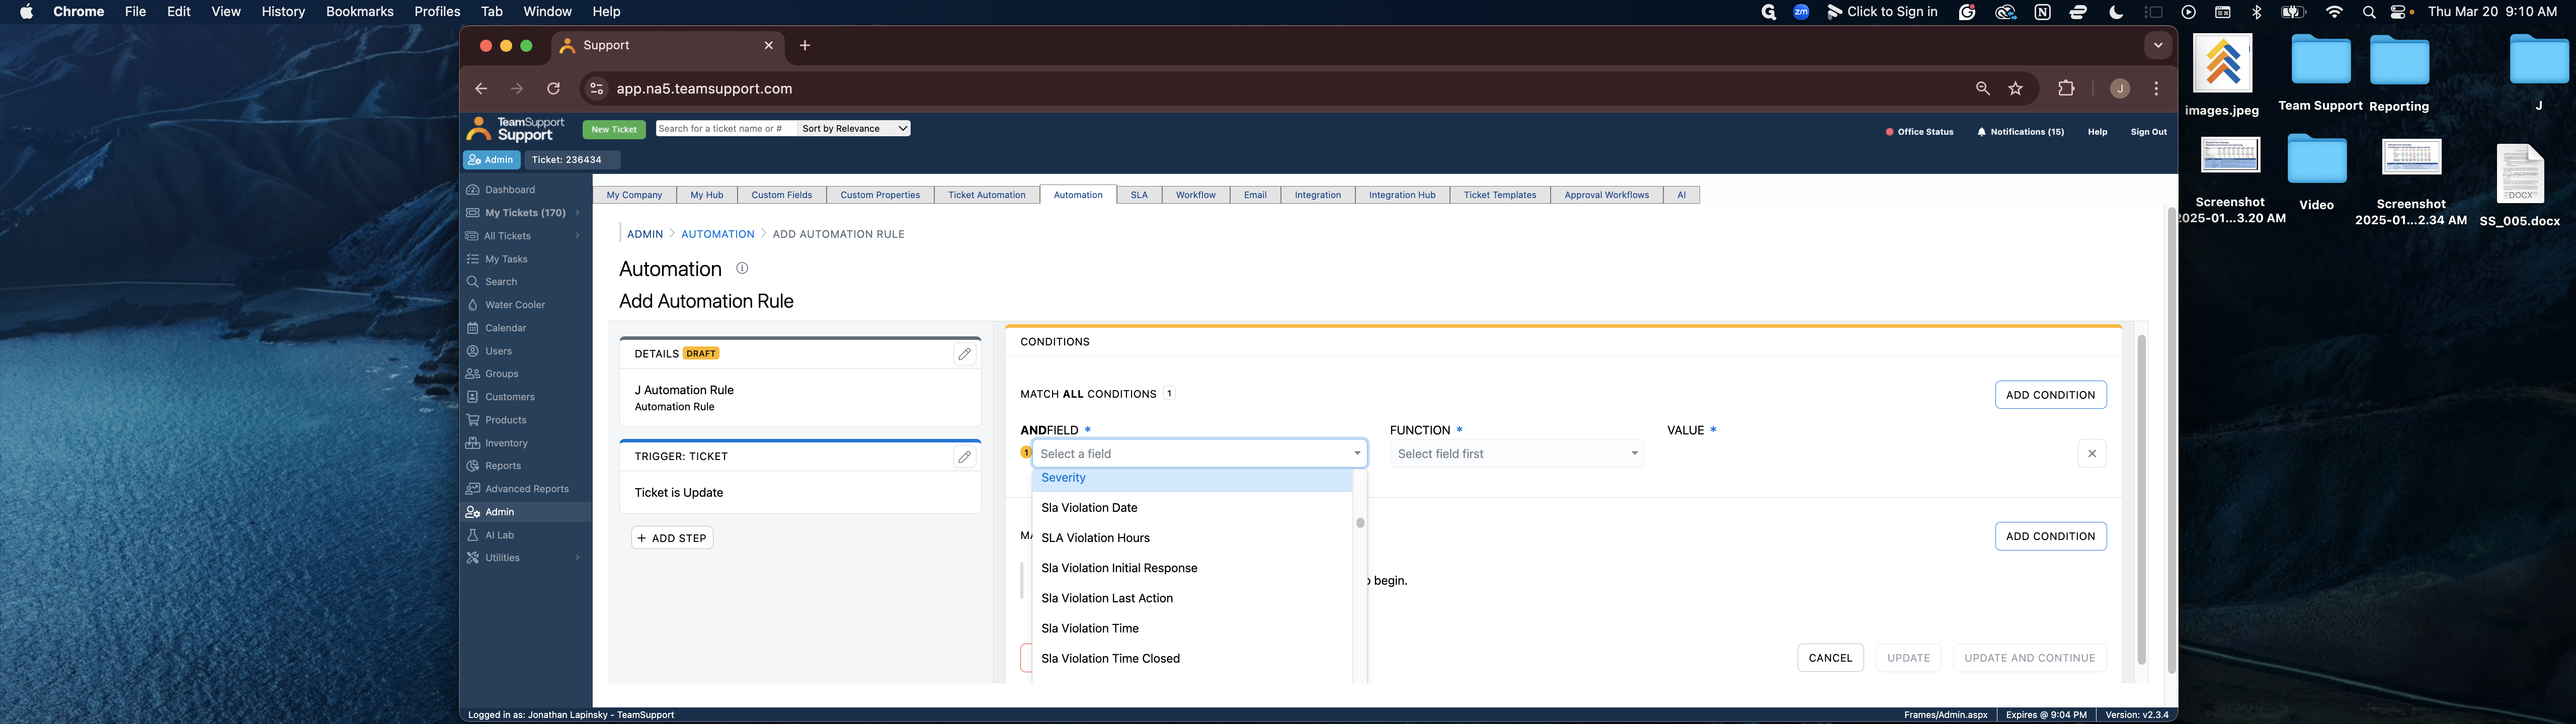

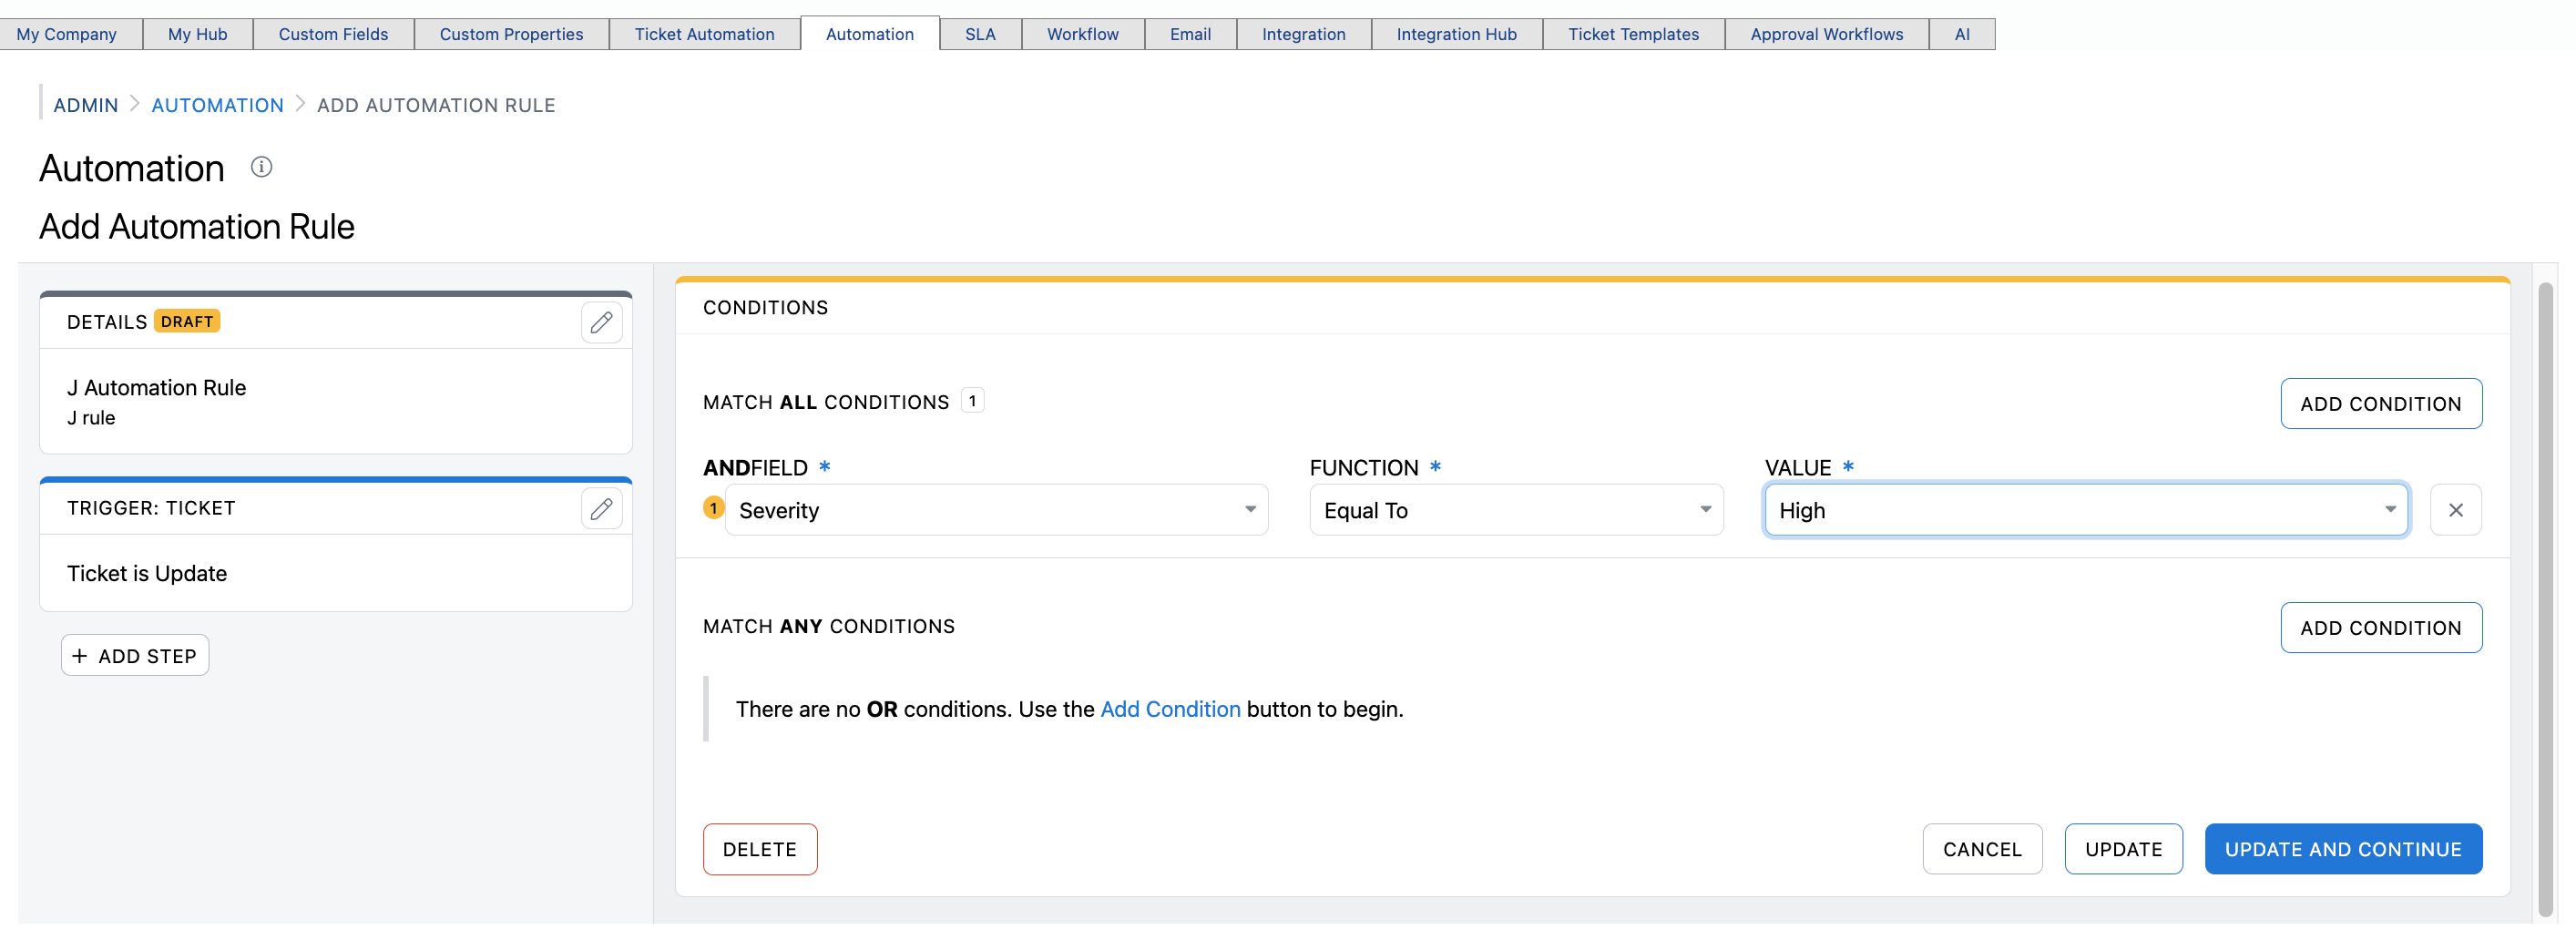
Let's say the severity is high. You set Severity in the first field, then set the function to "Equal To".
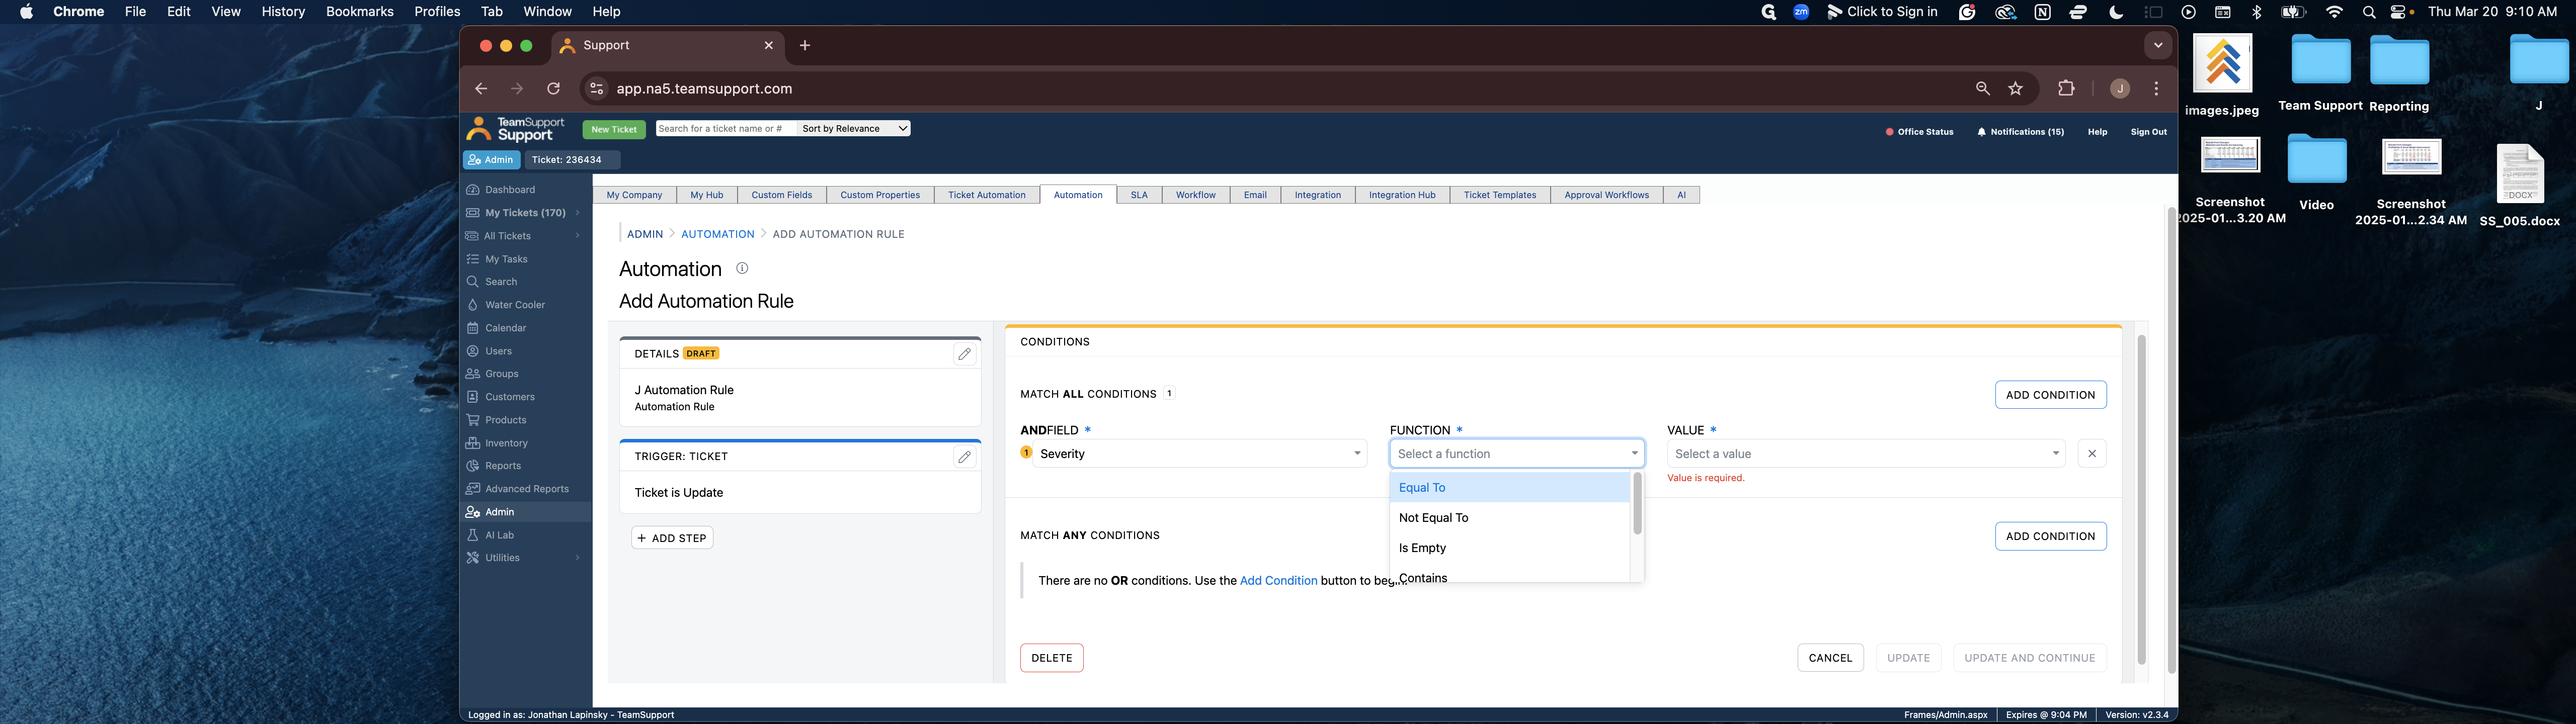
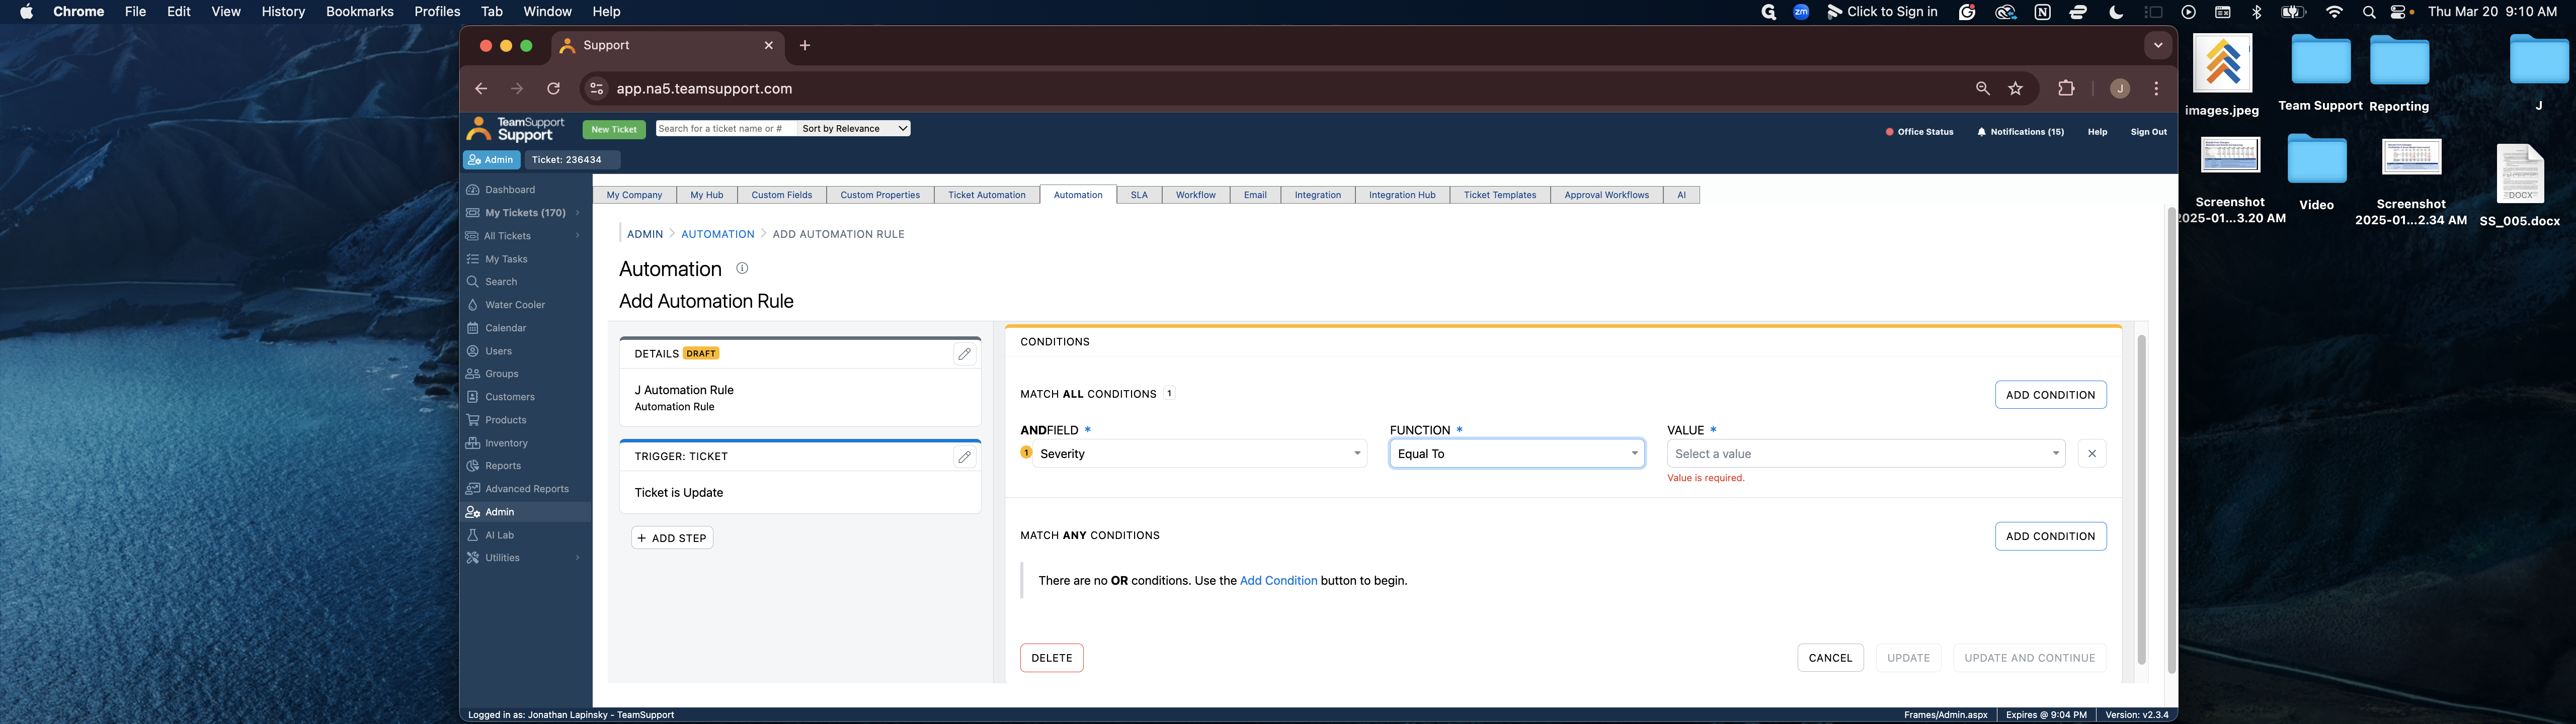
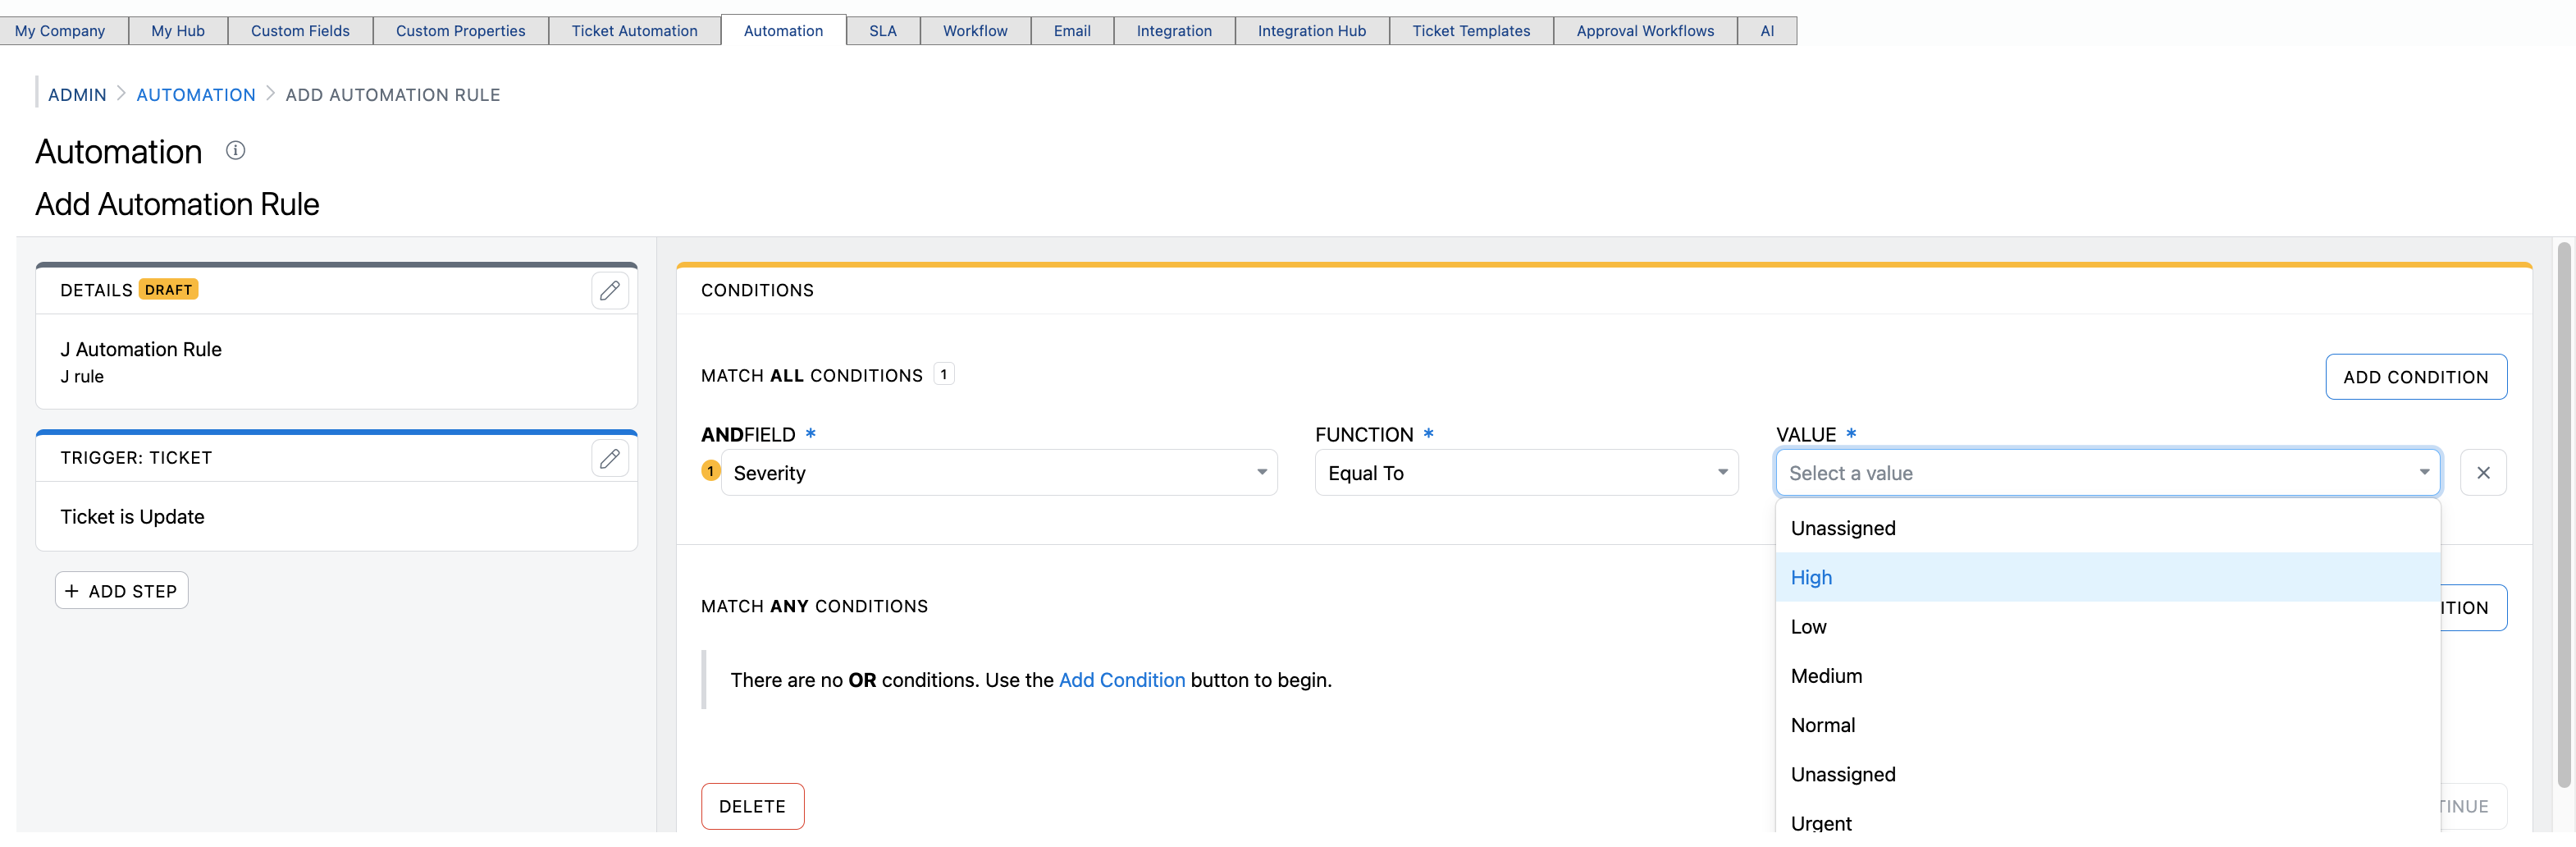
In this example, whenever a ticket is updated that has a severity of high, then any actions you've defined in this rule will fire off on that ticket.
Note that this will fire on any tickets that have a severity of high. If you want the rule to run only on tickets where the severity has changed from one status to another, you will want to use the "changed" function when setting up conditions.
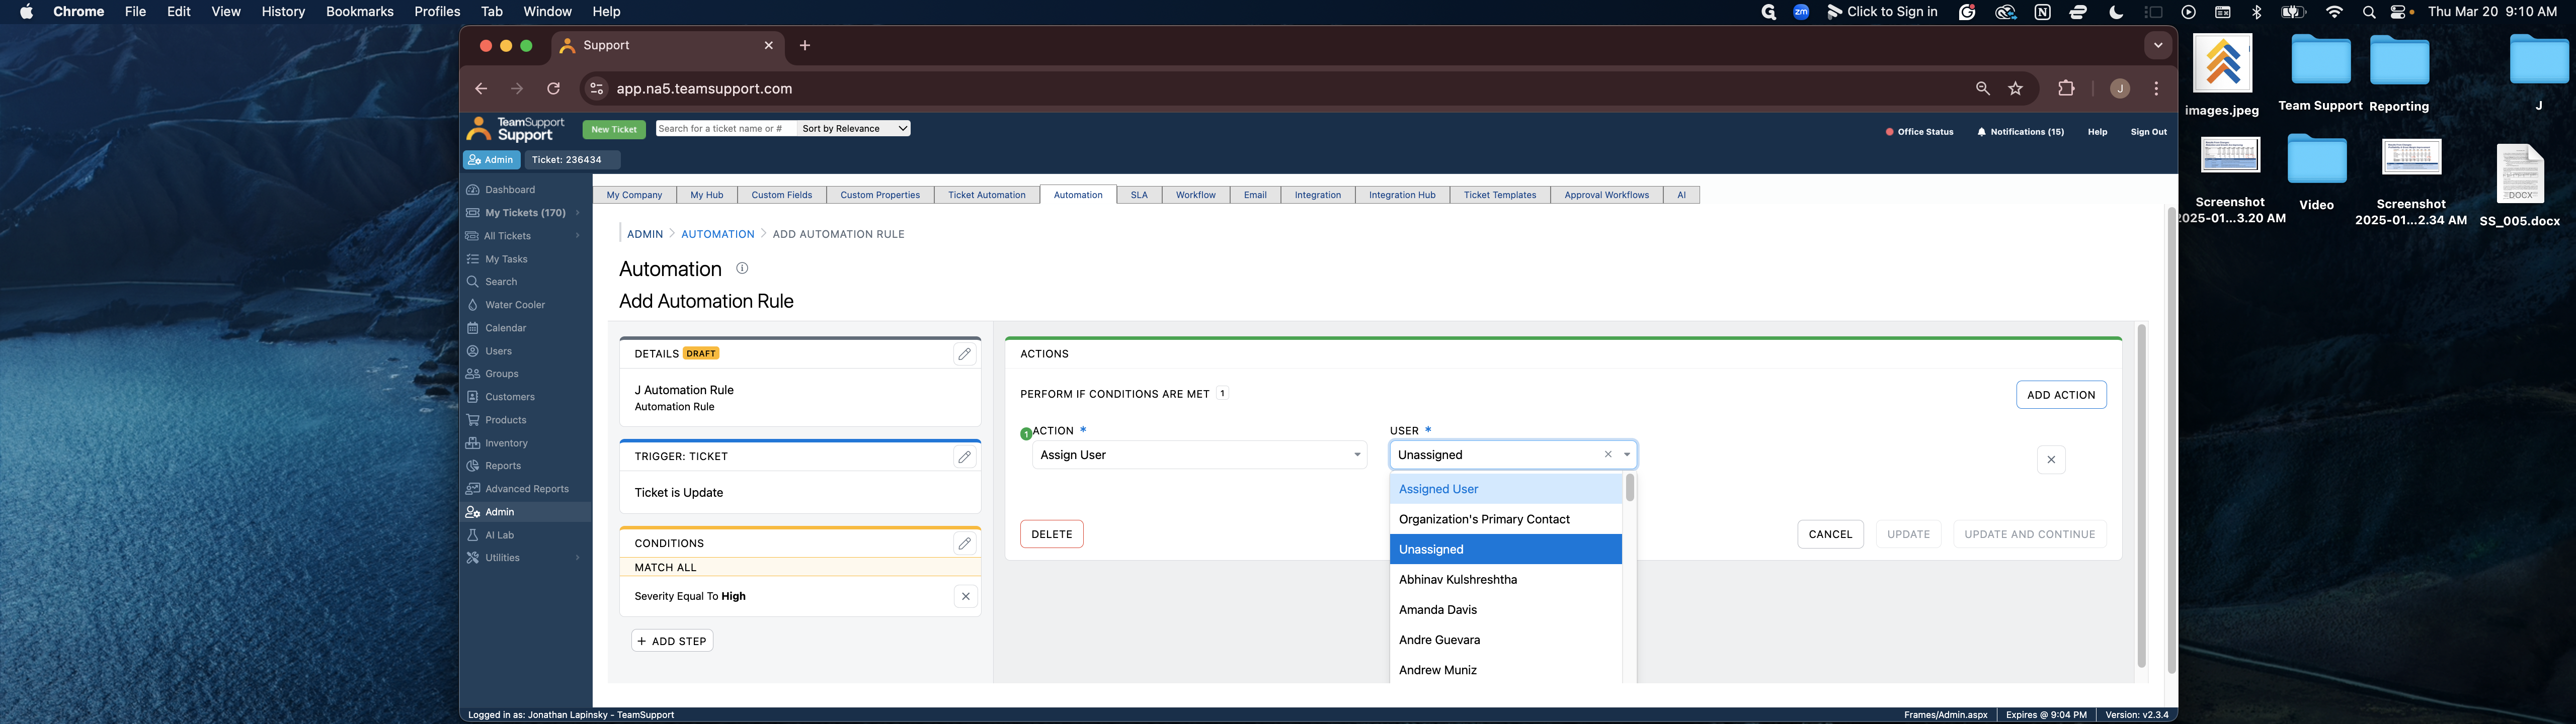
These actions align with the current TeamSupport ticket automation. In this example you can simply notify the assigned user.

After you've configured your triggers, conditions and actions, you just save and enable your rule. In the future we will be allowing multiple conditions and actions blocks, if then statement, new action types and AI powered workflows into the engine!
